Class 3B. Branches and Pull Requests with Git
Contents
Class 3B. Branches and Pull Requests with Git#
Before this class, please make sure you watch the assigned Git videos on this page.
Lecture Outline#
1. Announcements and Recap (5 mins)
2. Introduction to Branches and Pull Requests (10 mins)
3. Guided Activity: Create a Branch, submit a Pull Request (25 mins)
Break (5 mins)
4. Project Activity (25 mins)
5. Tour of the Jupyter Lab Interface (10 mins)
Part 1. Announcements (5 mins)#
Lab 2 will be due Saturday September 24, 2022 at 6 PM
My office hours will be 30 minutes after every class on Tuesday, Thursday 17:00 - 17:30. You can also ask for help anytime on Ed Discussion, as well as visiting any of the labs.
Project Details released today, Milestone 1 will be due next week
Part 2. Introduction to Branches and Pull Requests (20 mins)#
Create and switch to a new branch#
To checkout a new branch that doesn’t already exist, use:
git switch -c new_branch_name
Switch to an existing branch#
To switch to a new branch that already exist, use:
git switch branch_name
Part 3. Guided Activity: Create a Branch, submit a Pull Request (20 mins)#
Partner 1: “Owner” –> partner1/class03A.git Partner 2: “Contributor”
Give the contributor access to class03A repository
Usually use the github username
Partner 2 “Clones” the repository locally
git clone https://github.com/partner1/class03A.git
Partner 2 Creates and switches to a new branch:
git switch -c newchange
Partner 1 makes sure the branch is switched on Partner 2’s computer )(bad instruction):
git status
Partner 2 creates a new md file:
code newfile.md
Write a bunch of stuff
Save
git add .
git commit -m “new change”
git push
Partner 2 goes to the Github.com repo,
Click “Compare and Pull Request”
Request a review from Partner 1
Submit Pull Request
Tips#
Here are some command sequences that might be useful:
- git switch -c 'person1'
- git switch -c 'person2'
- edit the file
- add, commit, push
- deal with the Pull Request(PR) on GitHub
Break (5 mins)#
Part 4. Project Activity (20 mins)#

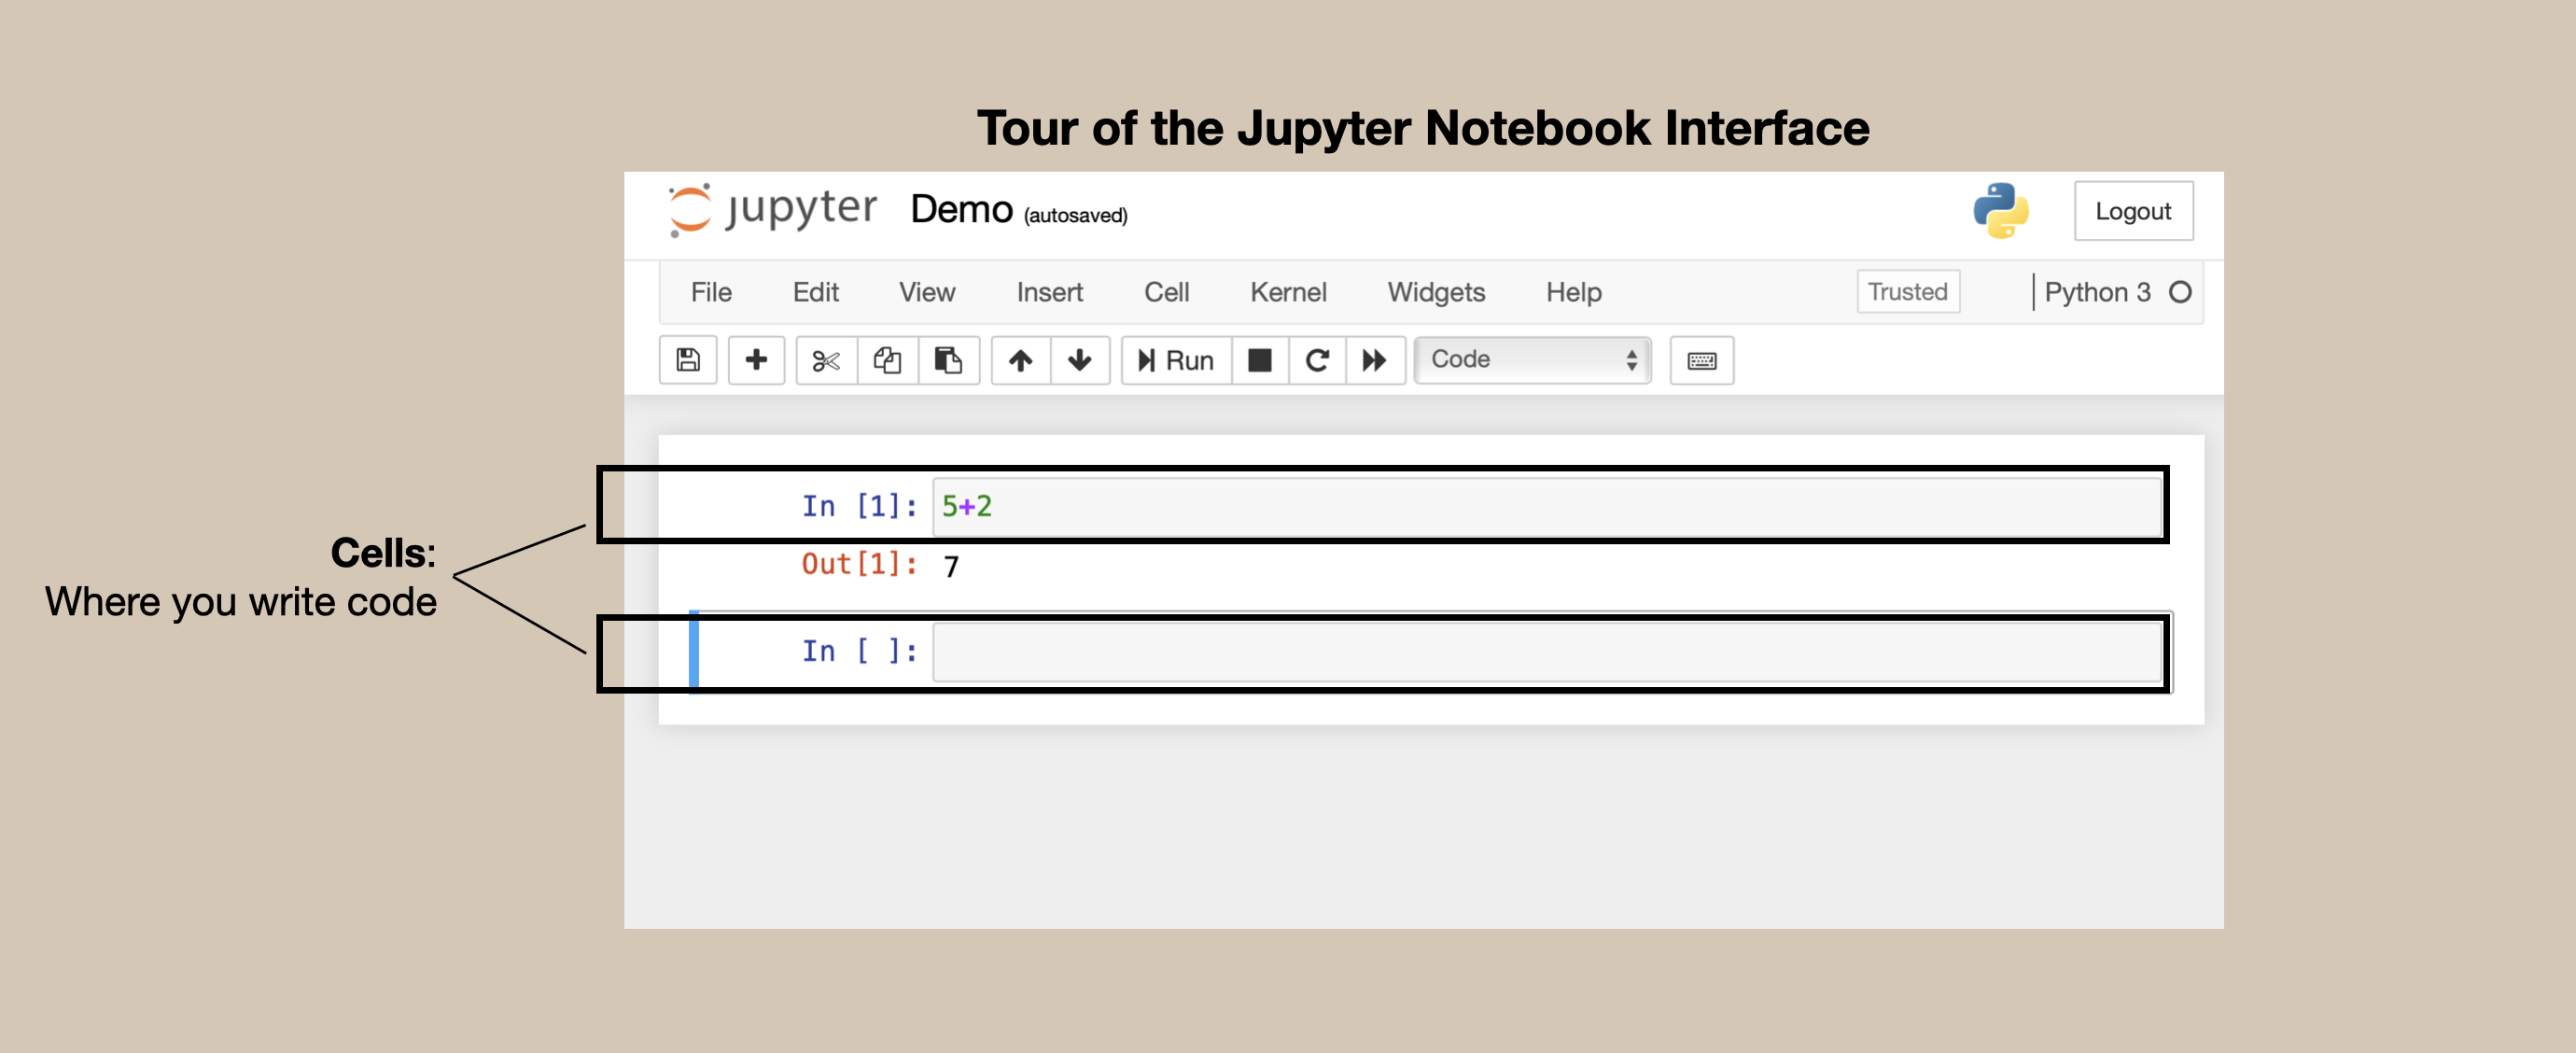
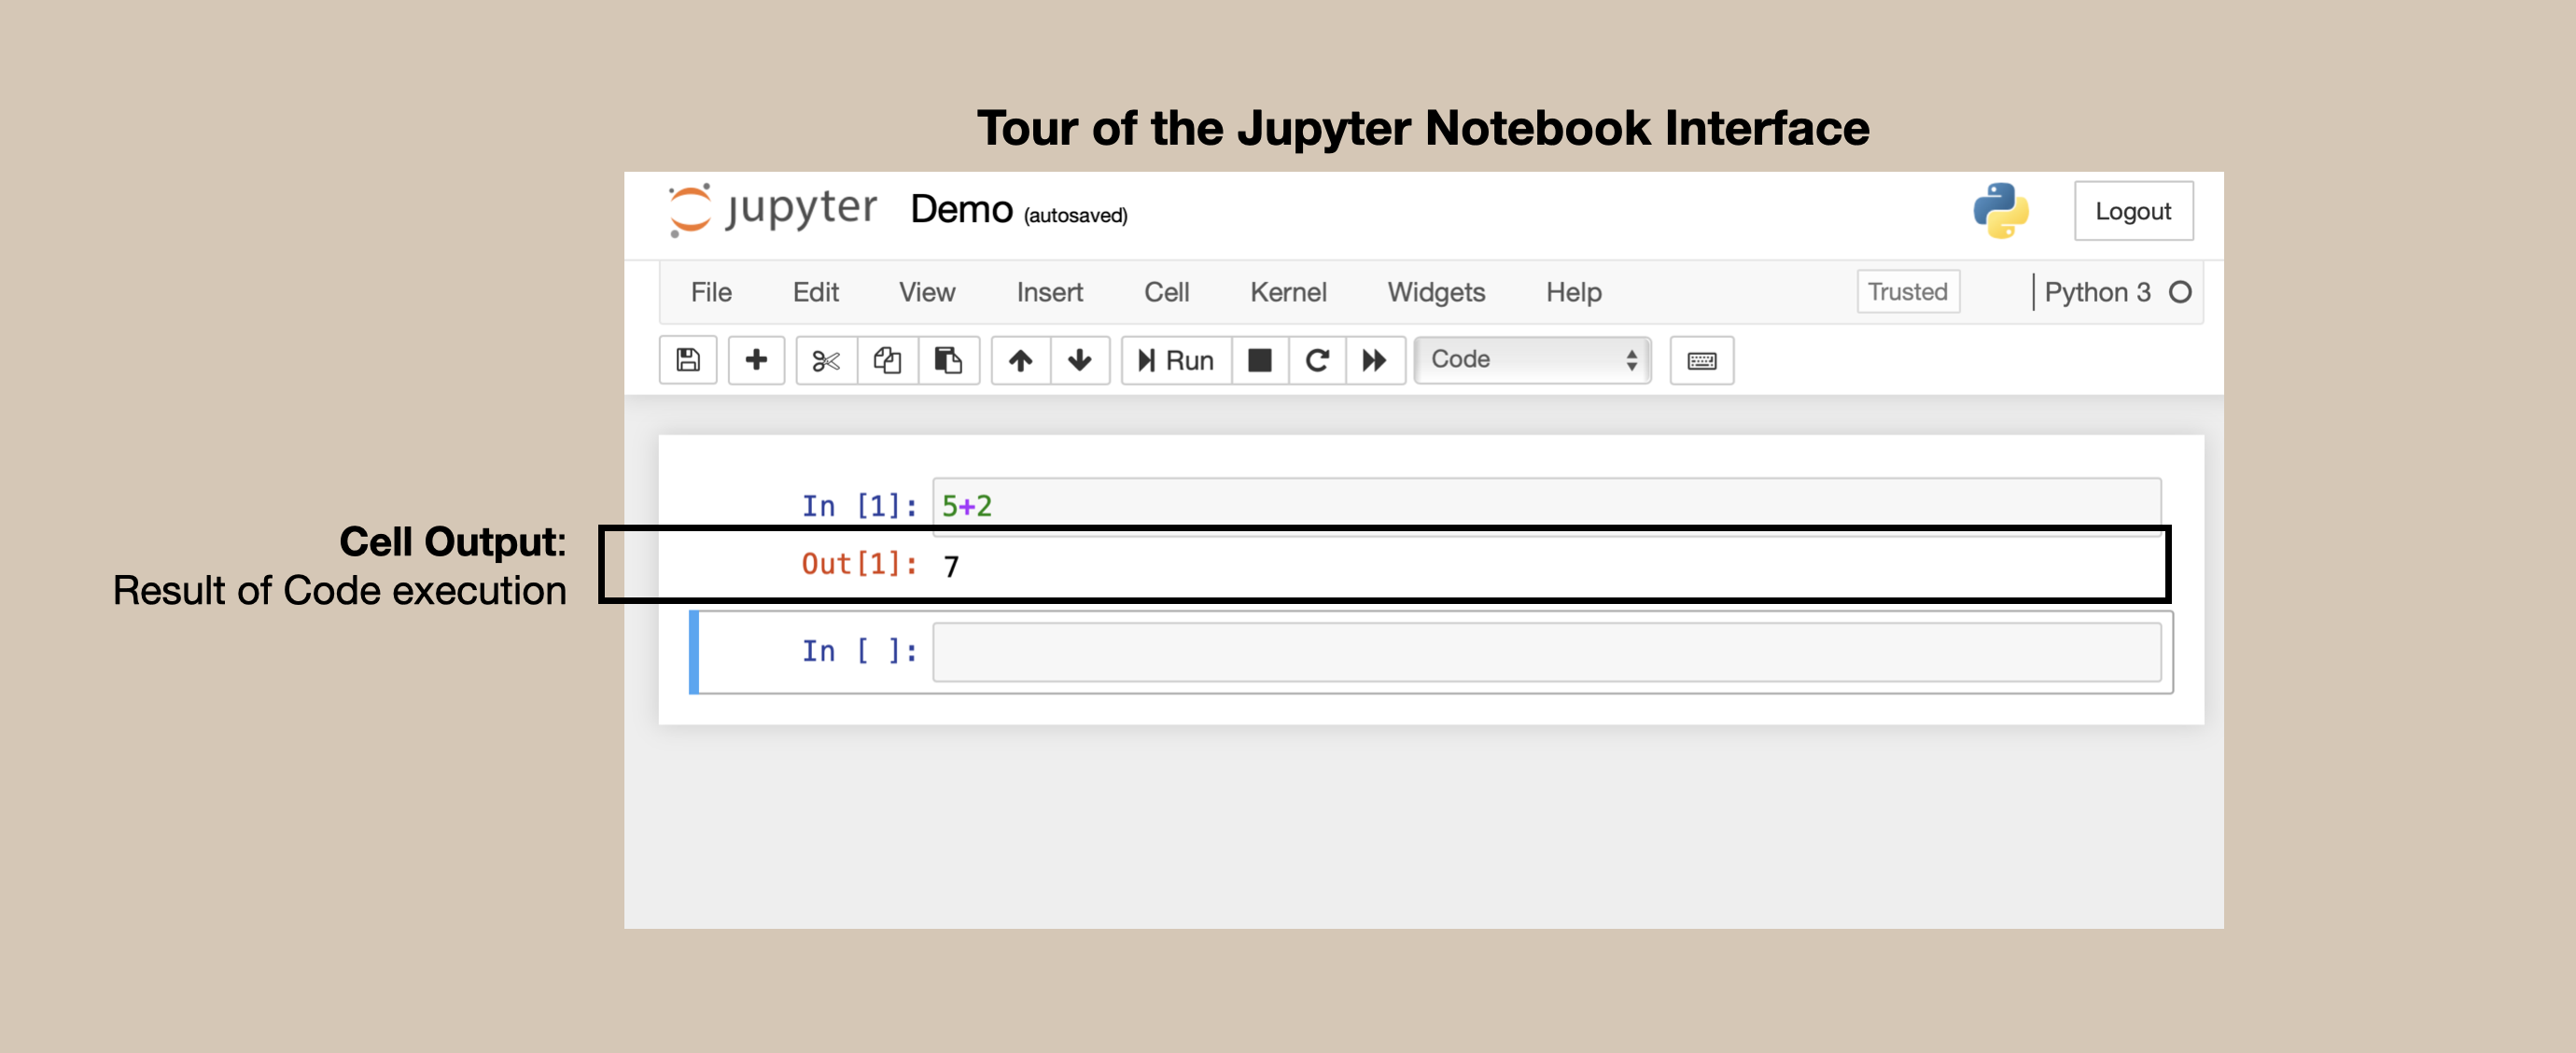
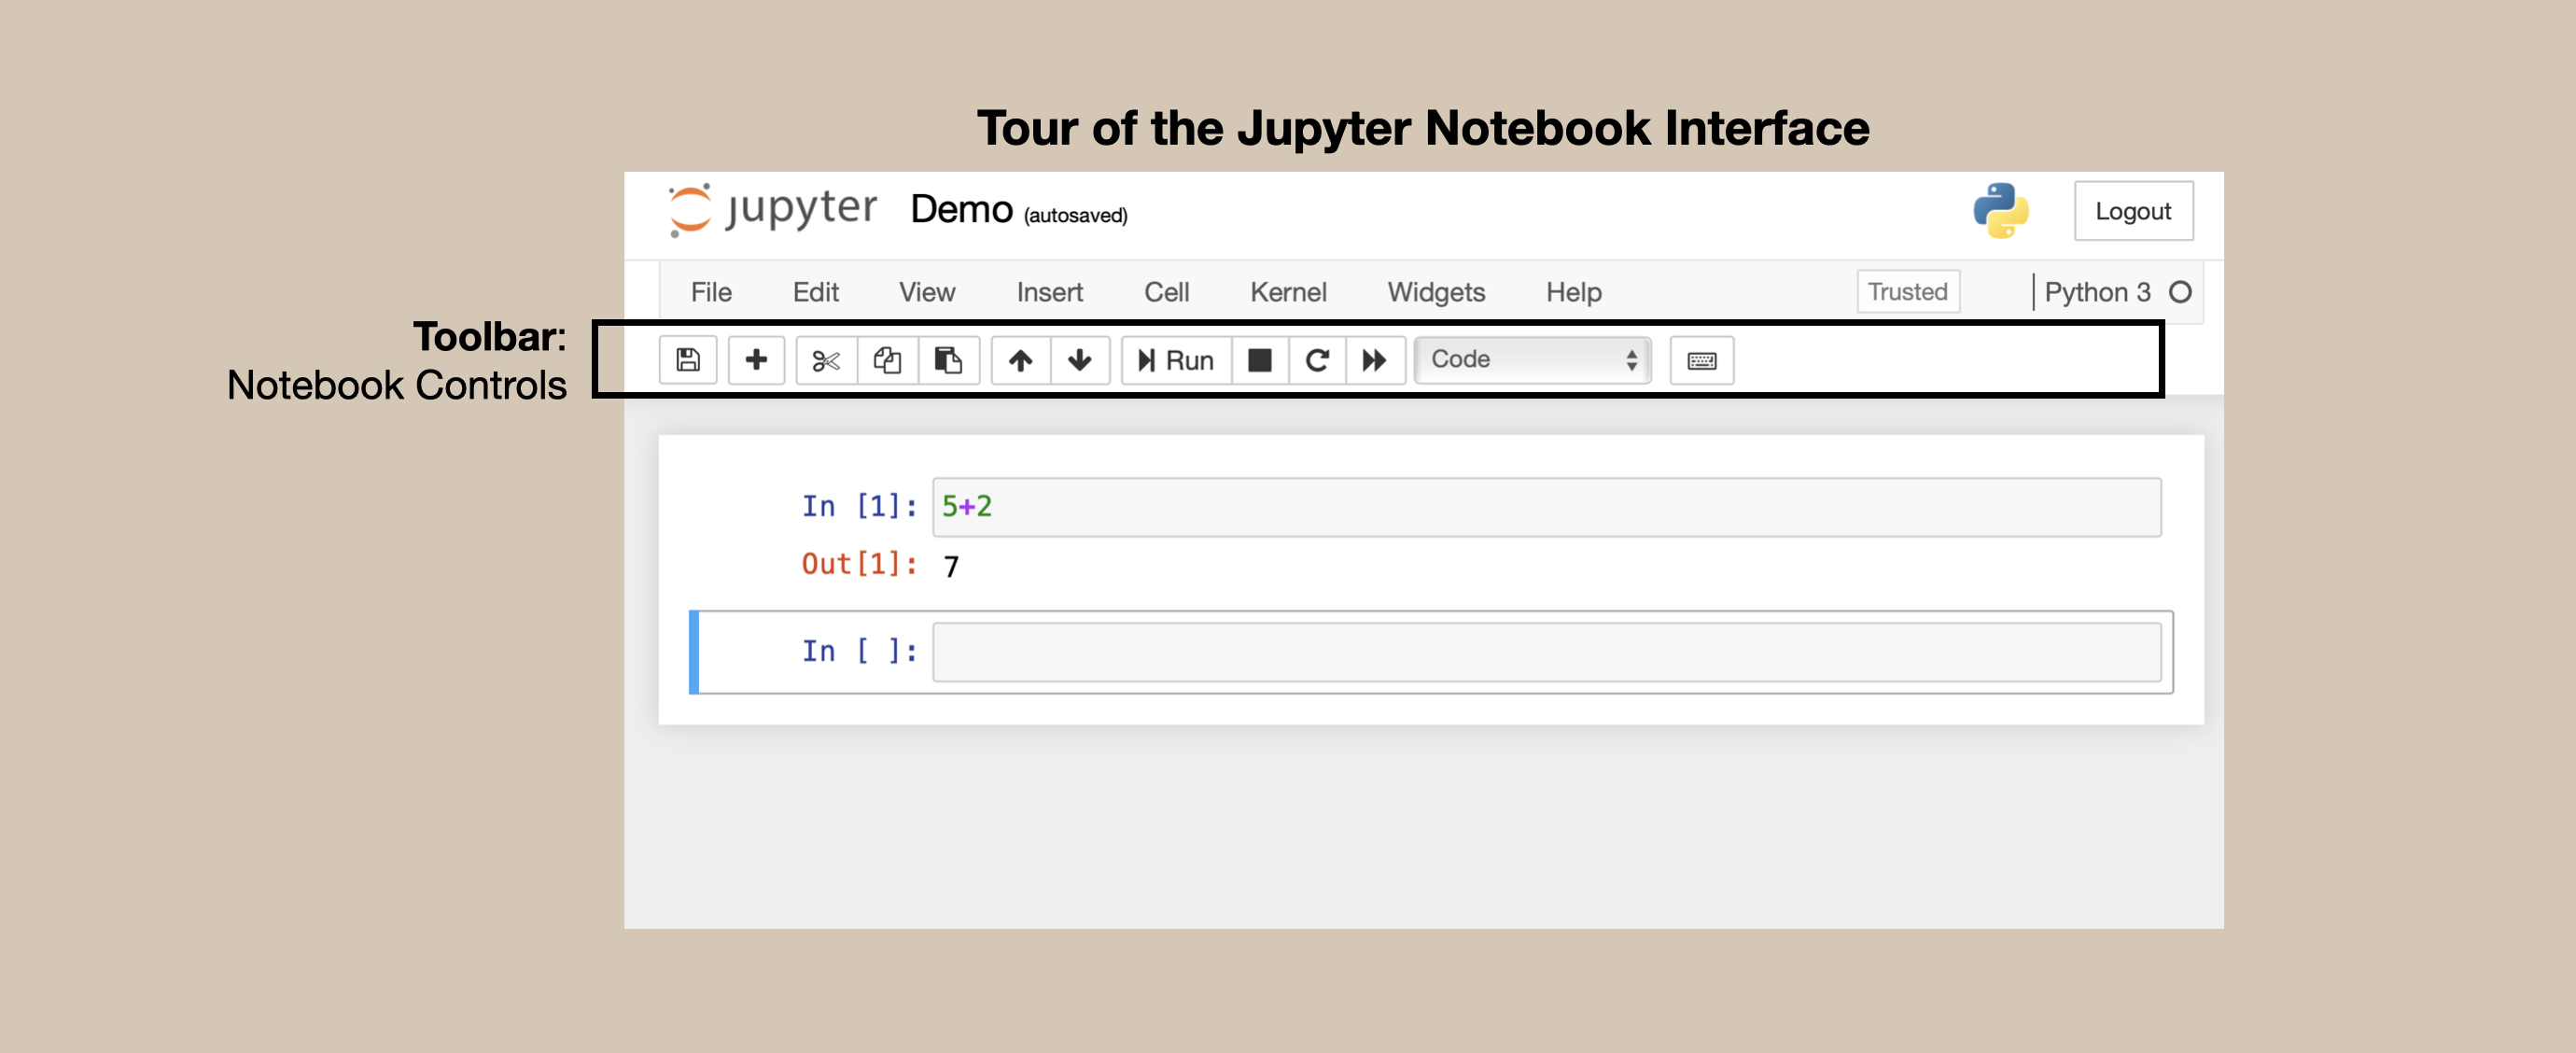
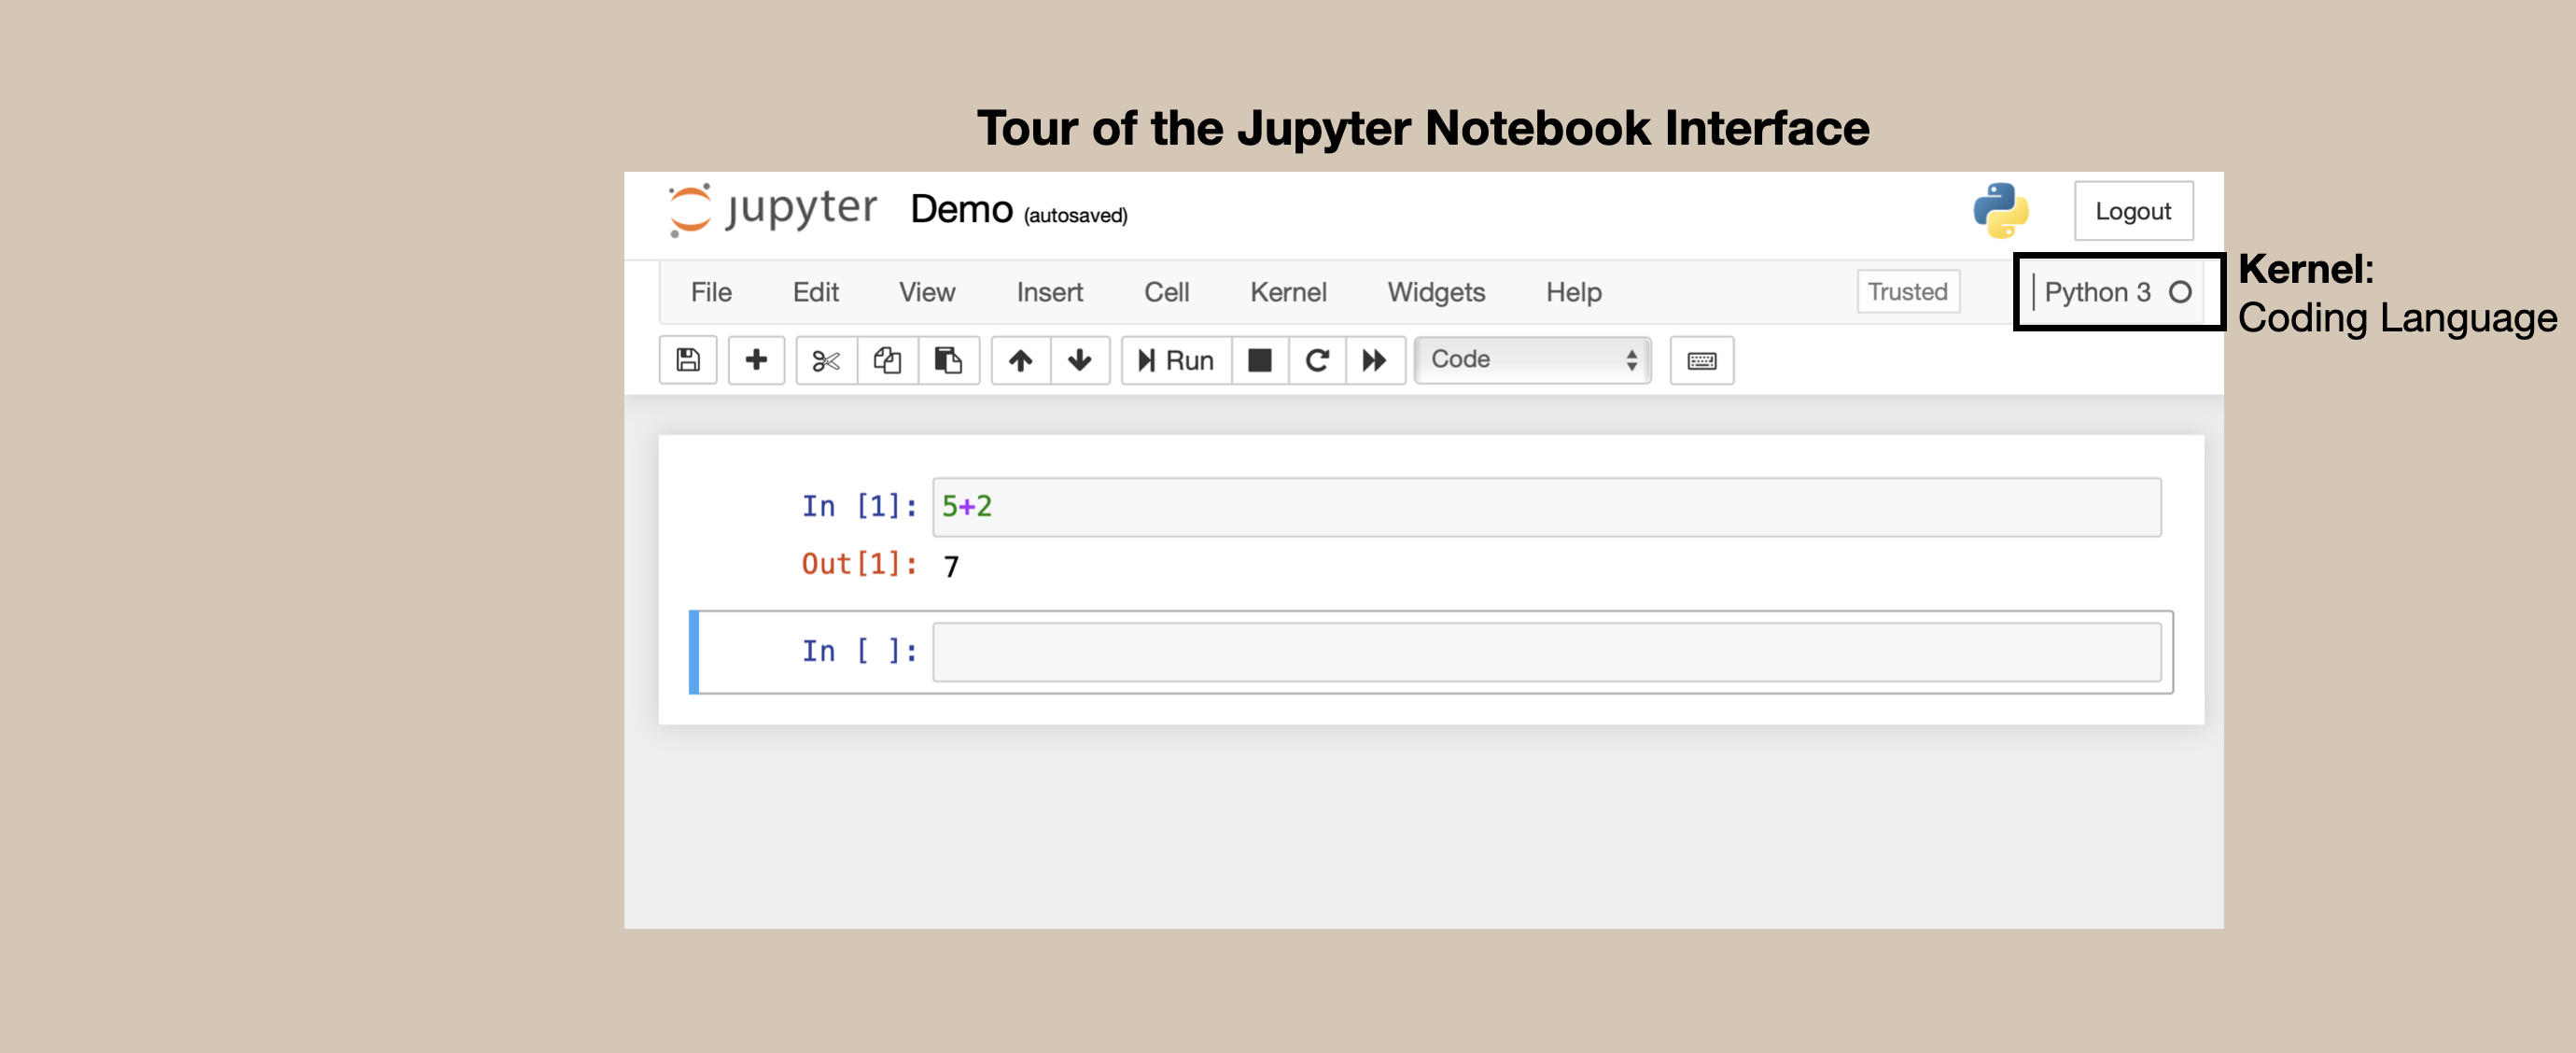
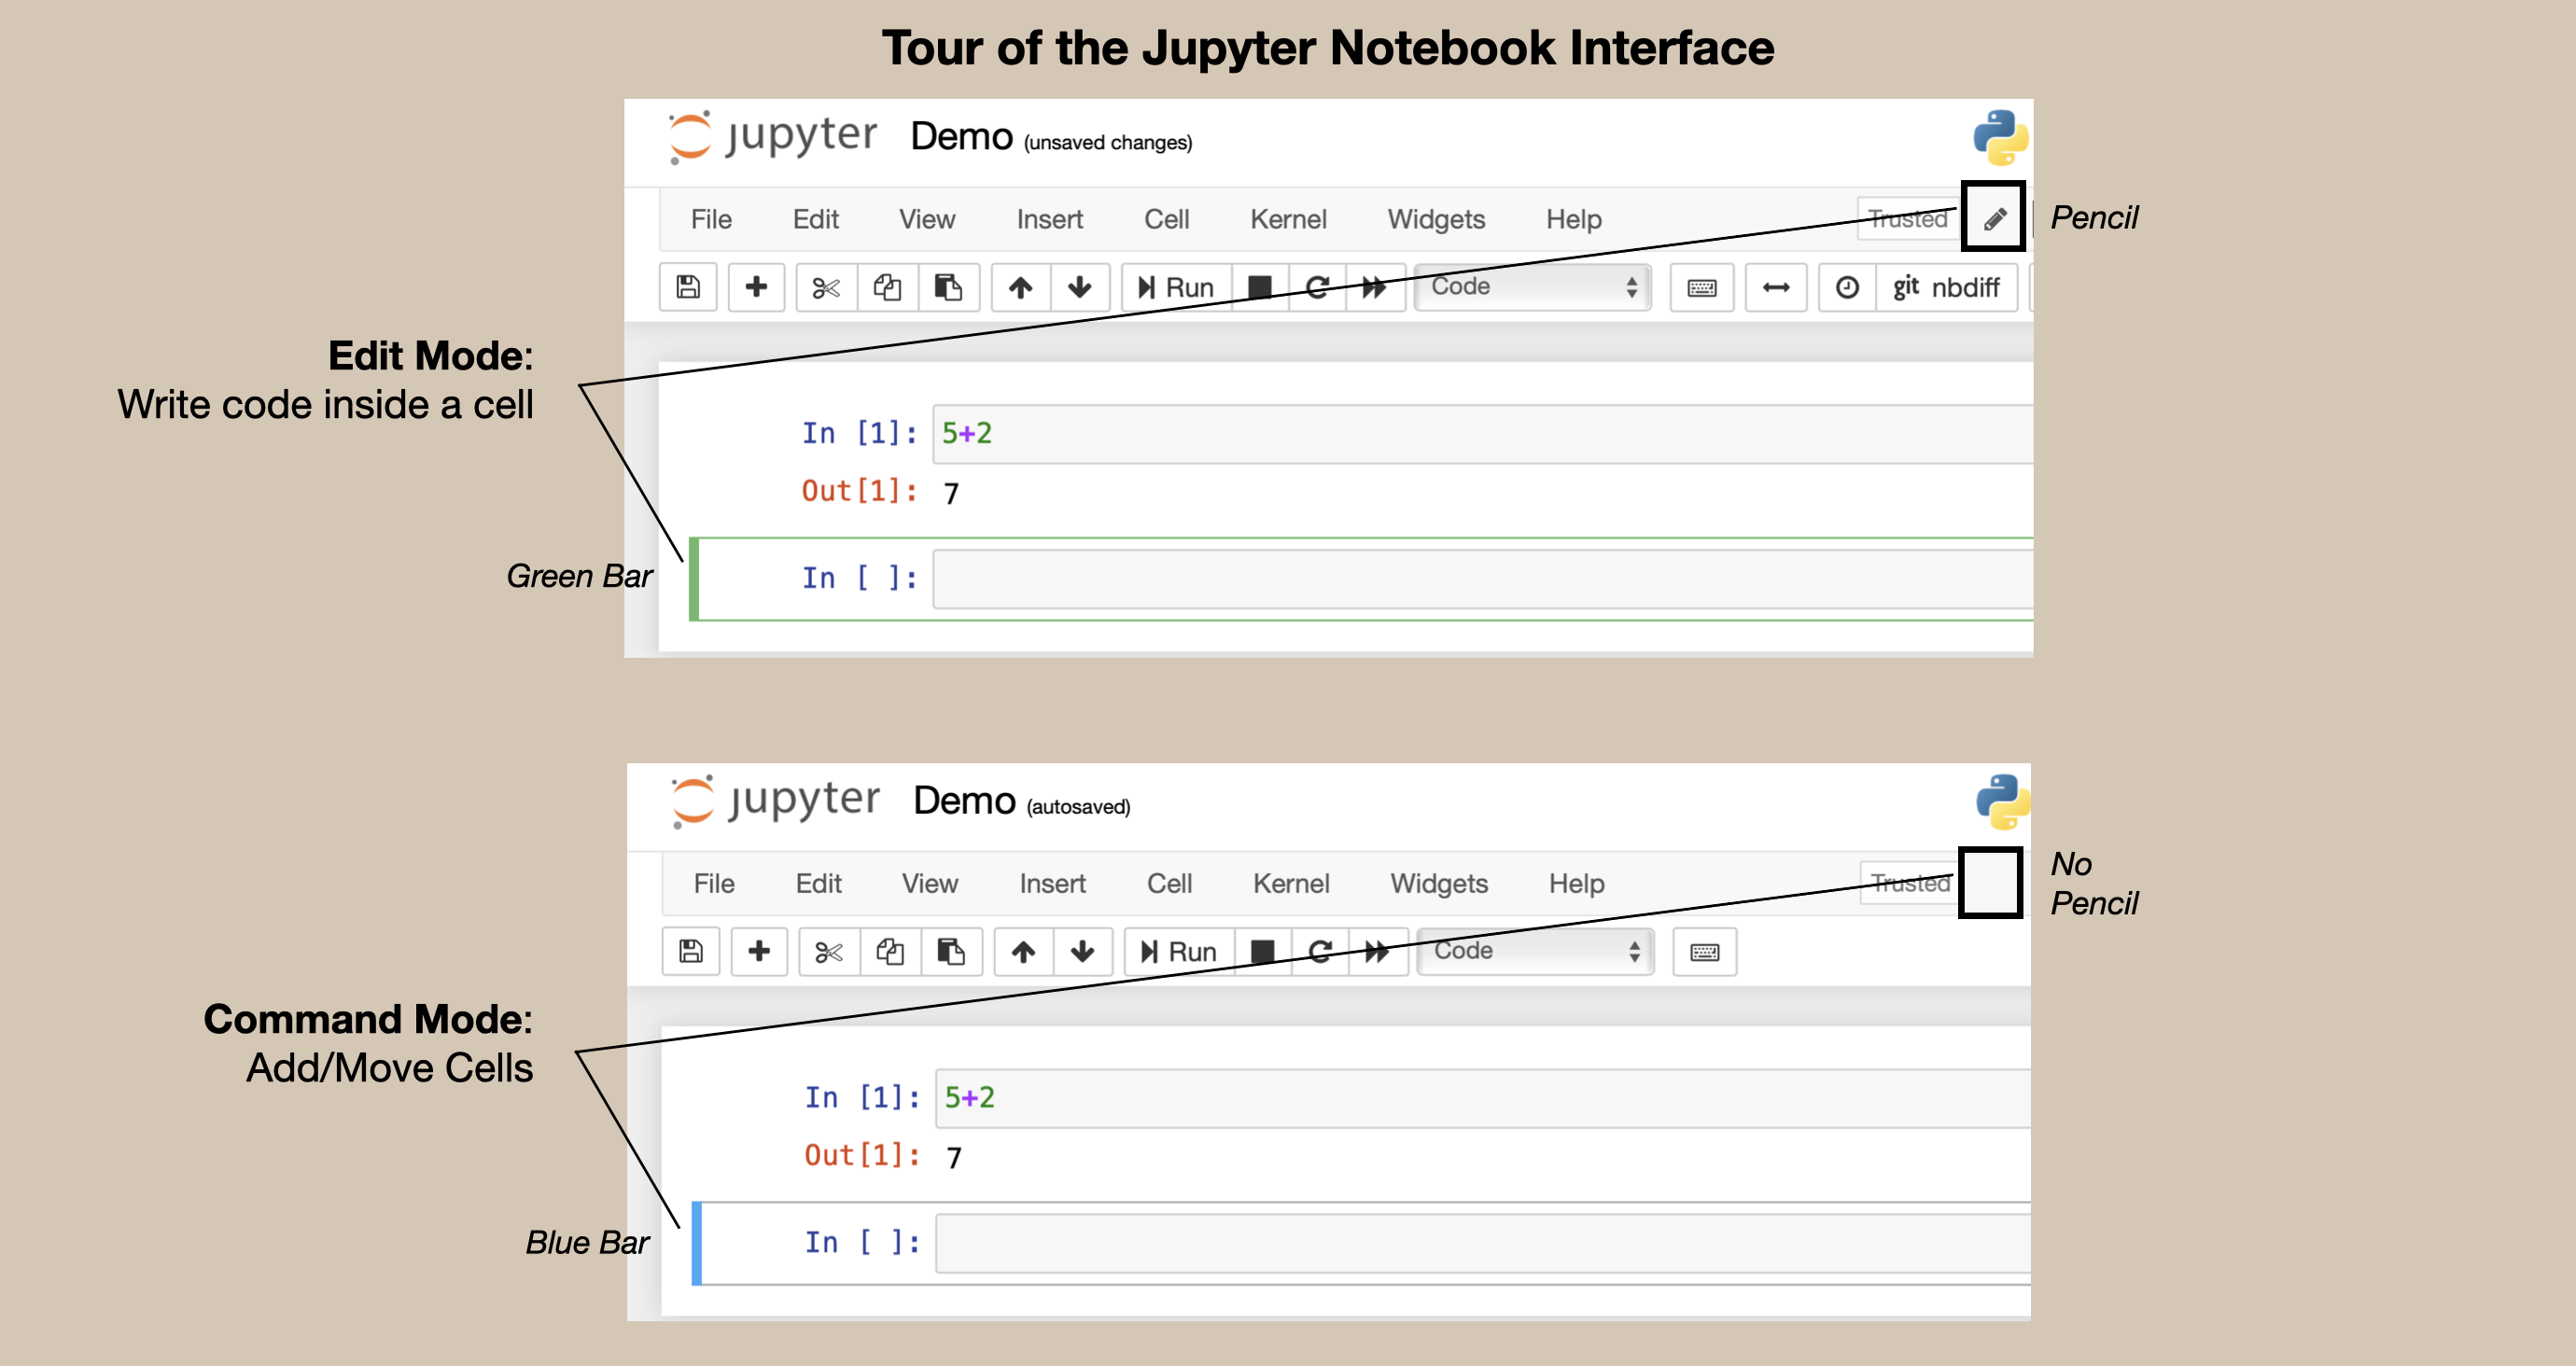
Part 5. Tour of the Jupyter Lab Interface (15 mins)#
Note: Some images may look slightly different than yours as the software gets more polished and icons/user interfaces change, but this should give you a general gist of the essential things.
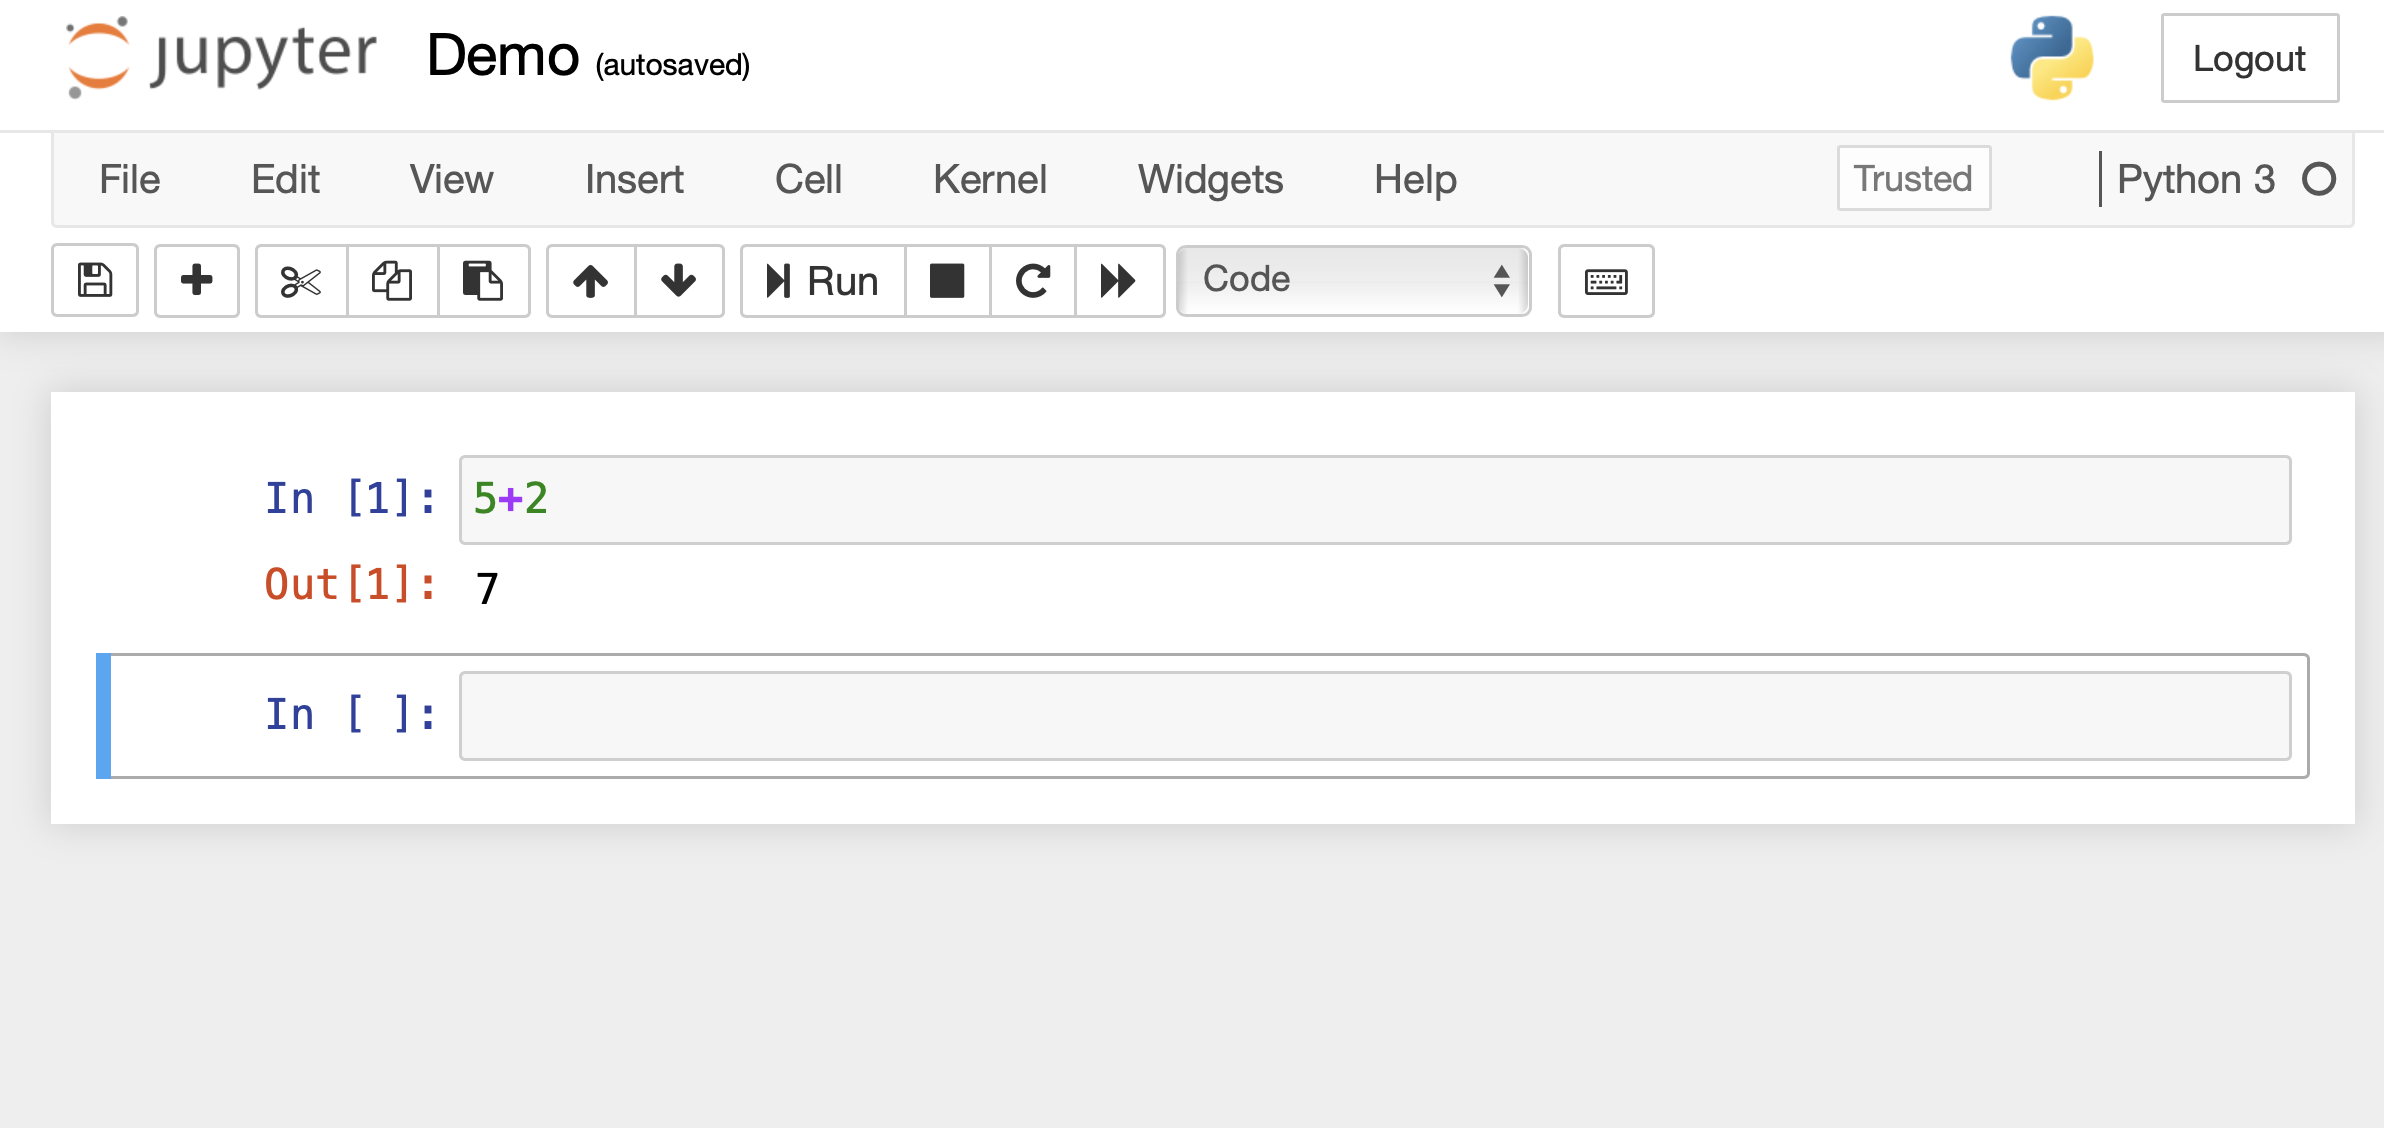
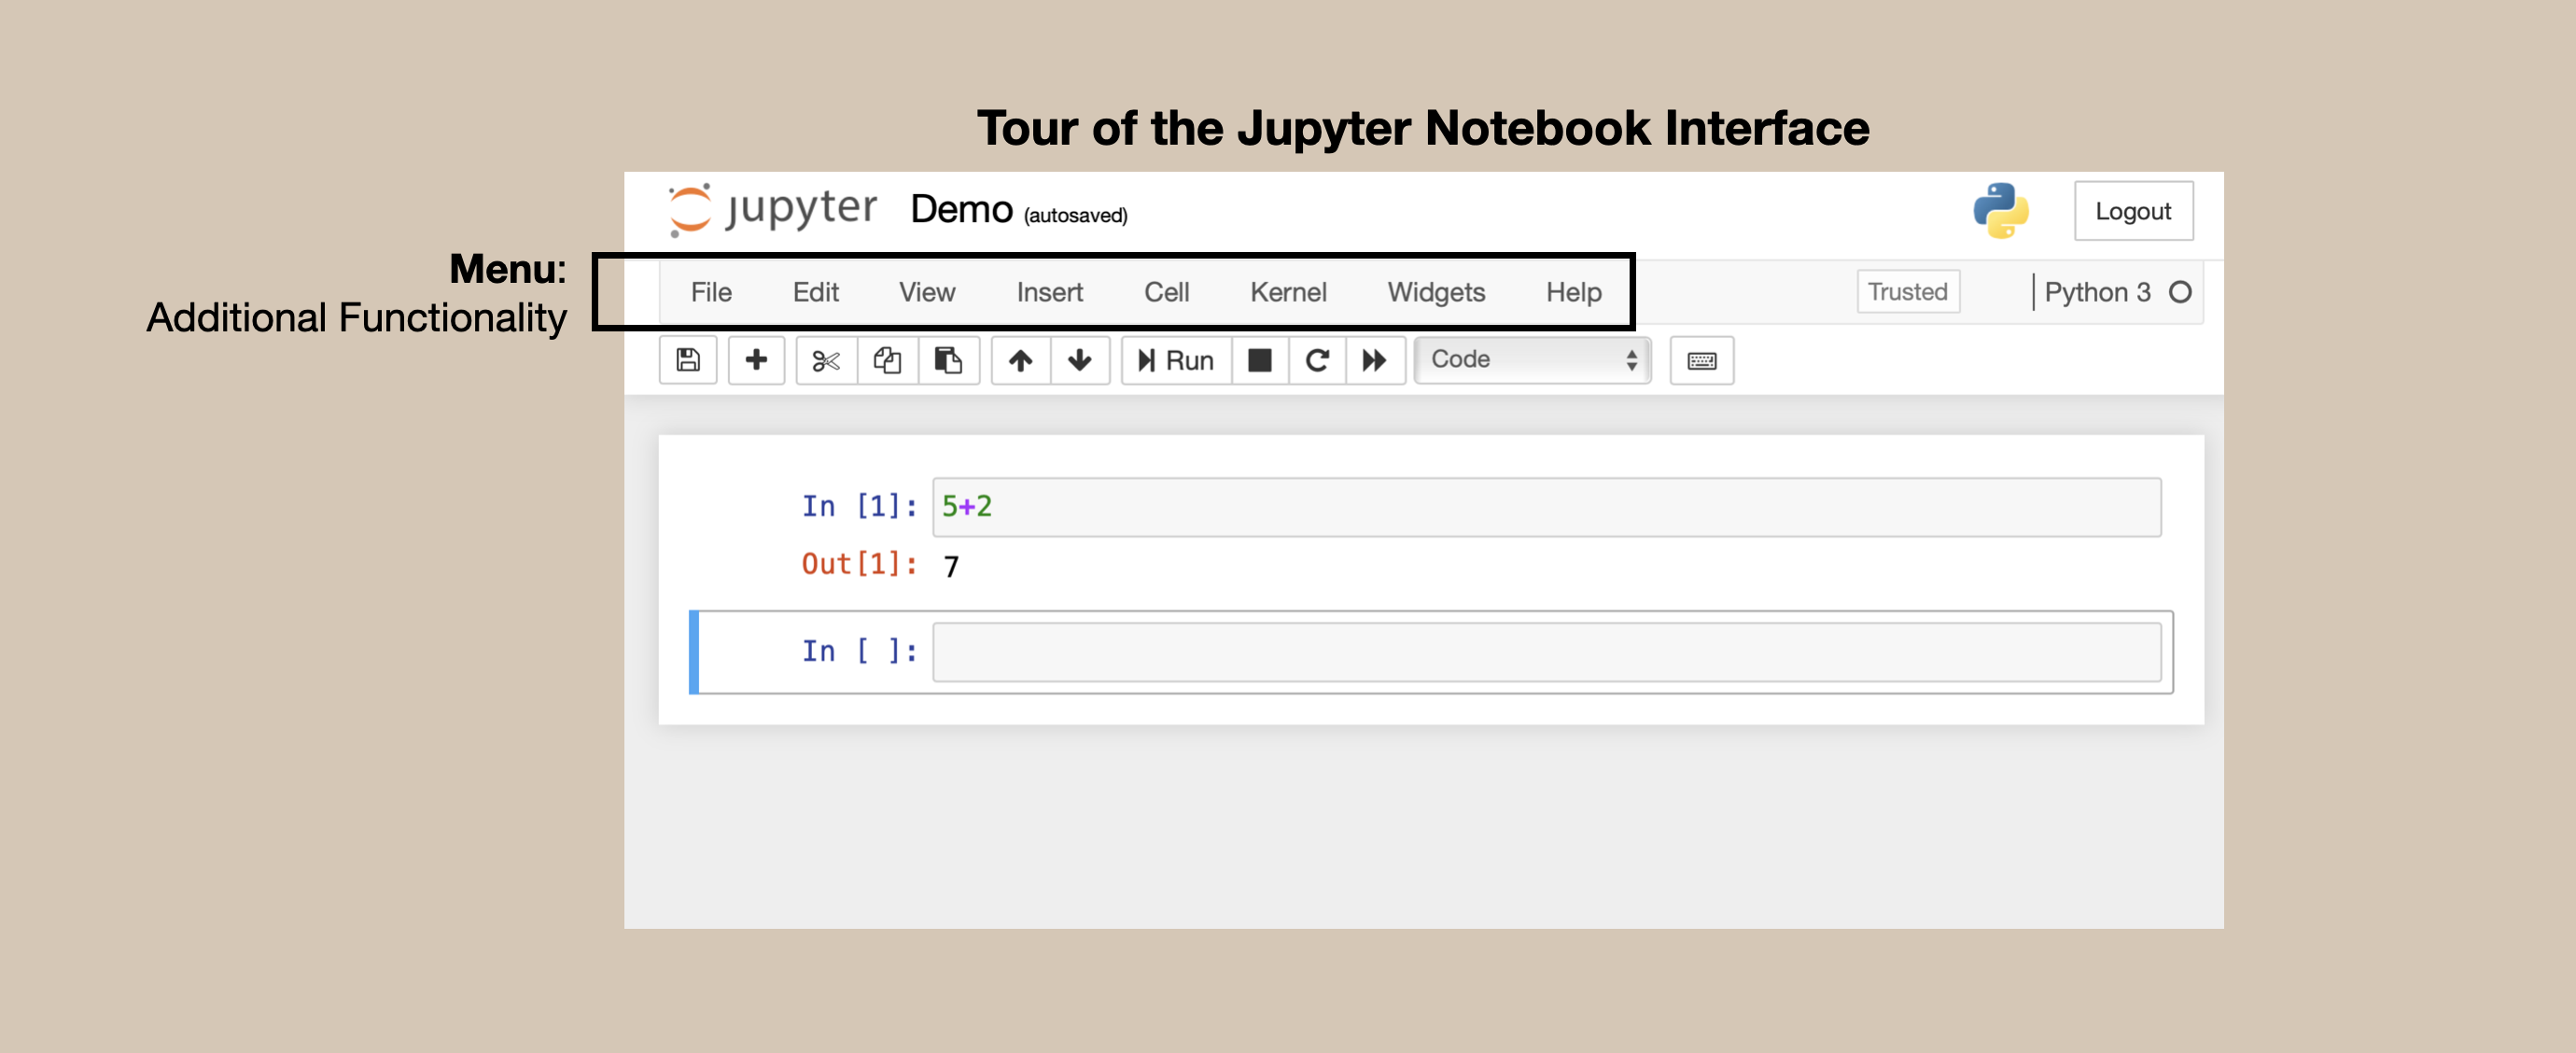
Useful things to know about JupyterLab#
Open JupyterLab
Create new notebooks
Entering and exiting “Command mode”
Converting cells to “markdown format”
Using JupyterLab for Markdown files
Close JupyterLab