Task 1 - Set up your computer
Contents
Task 1 - Set up your computer#
First, you should follow the install instructions on the course website.
Below are the instructions for you to continue installing software on your system. We will need this for the first python lecture this week.
Getting Started#
Once you are done with the install instructions, you can get started with the rest of Lab 1.
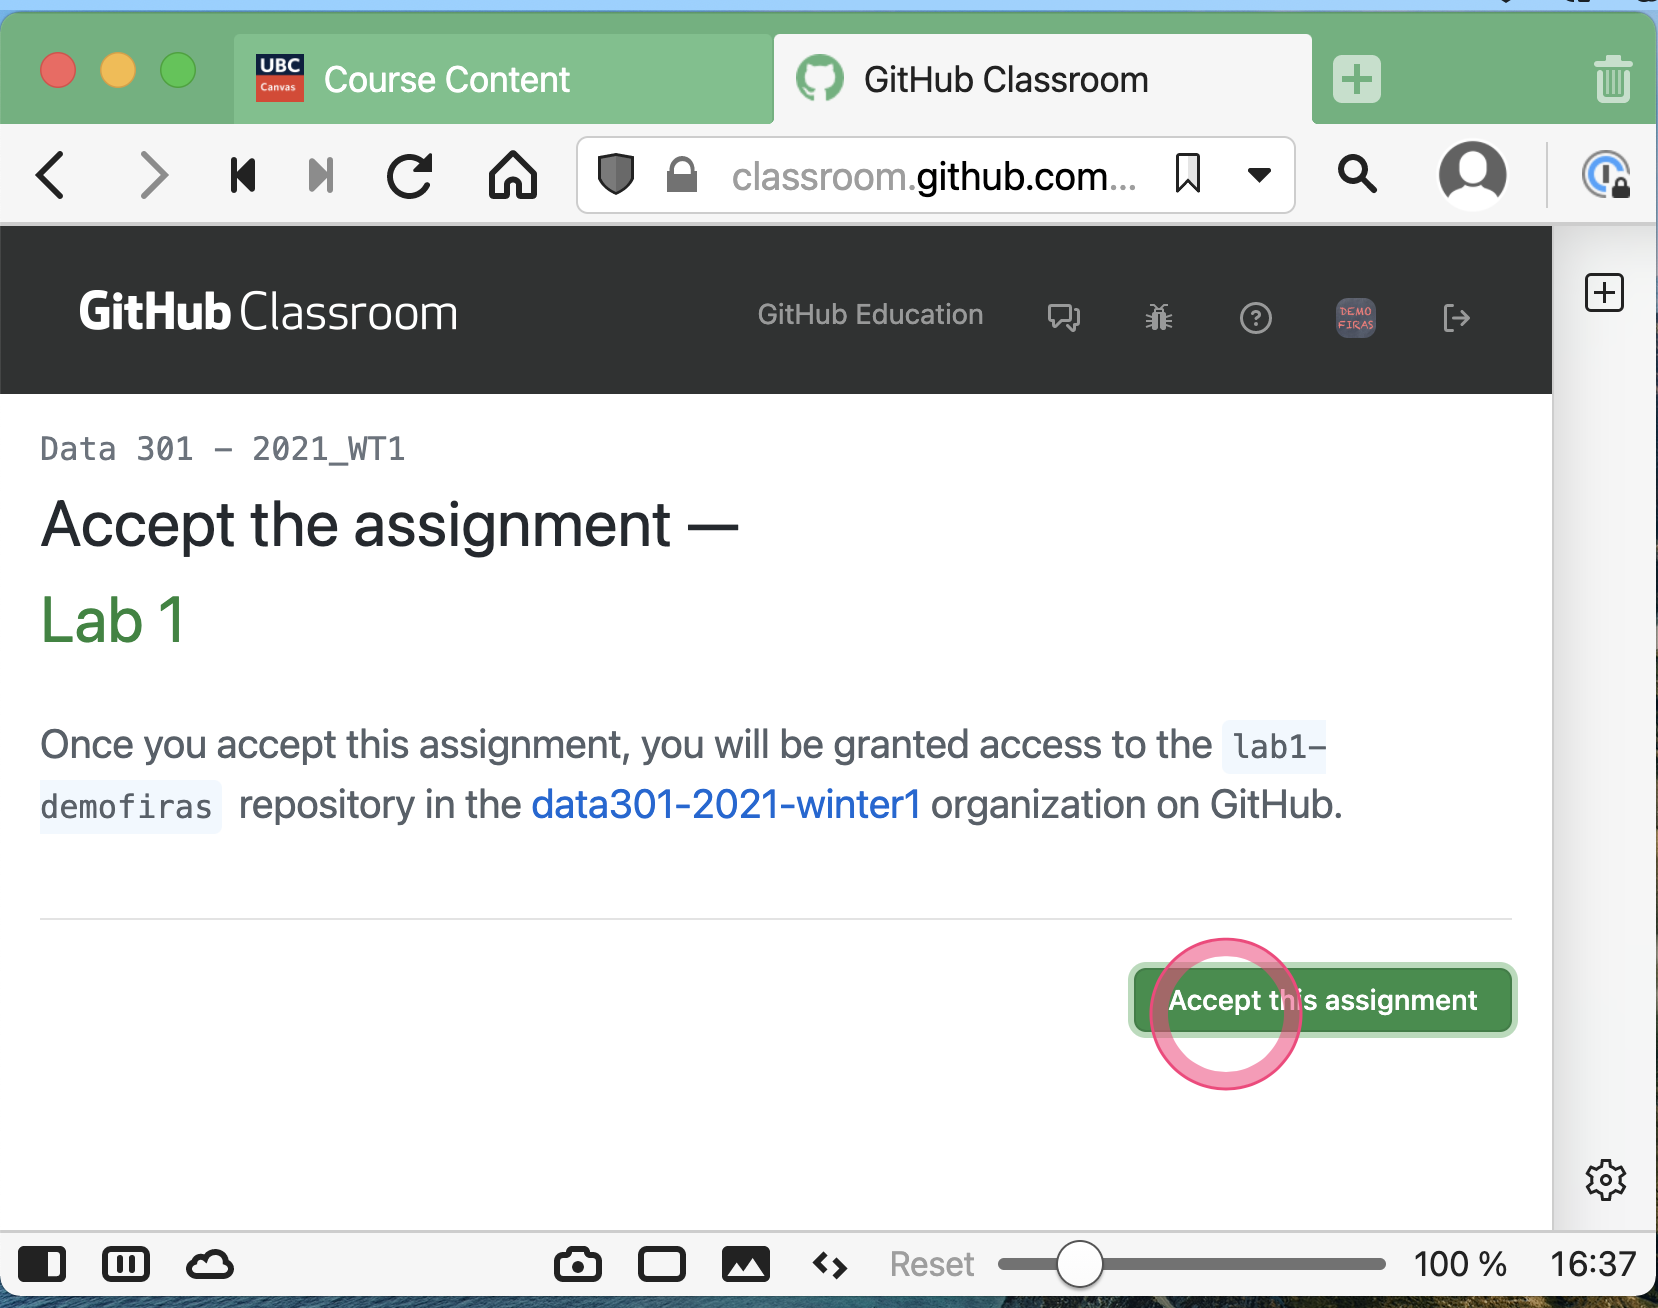
Task 1.1: Accept the lab assignment#
You will find the link to accept the lab on Canvas, under “Course Content ▶ GitHub Classroom Links”.
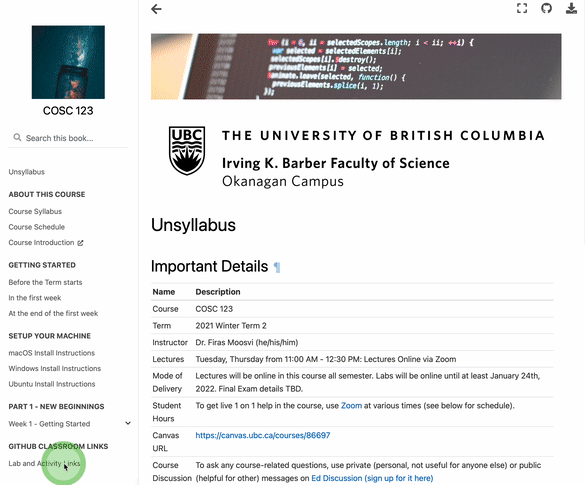
Just click on the “Accept Lab” link, and it will take you to the page on GitHub.com where you will complete your lab.
Important
For some labs clicking the link will take you to an intermediate page where you’ll be asked to wait till your “repository” is being created. Just be patient for a few seconds, and once it’s done you should reload and the repository will be there for you. This whole process shouldn’t take longer than 30 seconds.
You can find the link to accept the lab on Canvas, under “Course Content” and then “GitHub Classroom Links”.
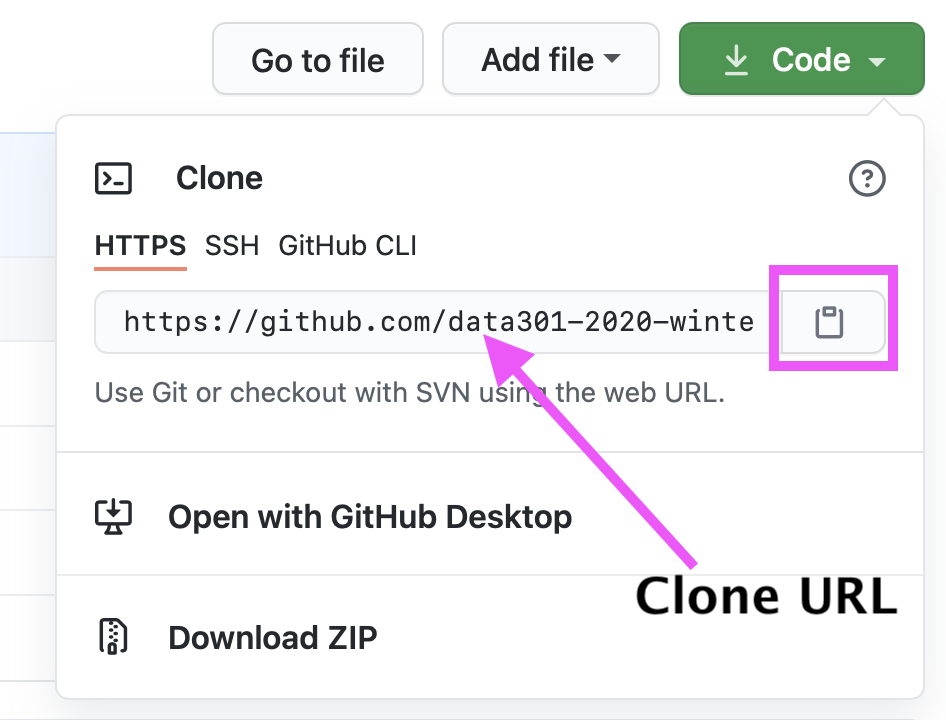
You can get your clone URL from GitHub:
Task 1.2: Use the clone URL and clone the Lab 1 repository on your local computer and navigate to that directory#
Open a new Terminal - when you do, generally you will start in your home directory (on Windows this will be
C:\Users\yourusername\and on macOS and Ubuntu this wil be/Users/yourusername). You can check your home directory by typingpwd(print working directory) and hitting enter.

To navigate to a new directory, you will need to use the
cdcommand and use tab-completion to find the directory on your computer where you cloned this lab:
cd ~/school/year3/cosc301/lab1-github-username
**Note: you may choose a different directory structure, based on how you keep your coursework organized on your machine. If you do not currently organize your coursework in a particular way, I suggest using the structure above.
You will then need to clone the GitHub repository somewhere locally (I suggest a directory structure like the one I above):
git clone https://github.com/firasm/test.git
Task 1.3: Add, commit, and push your changes to GitHub#
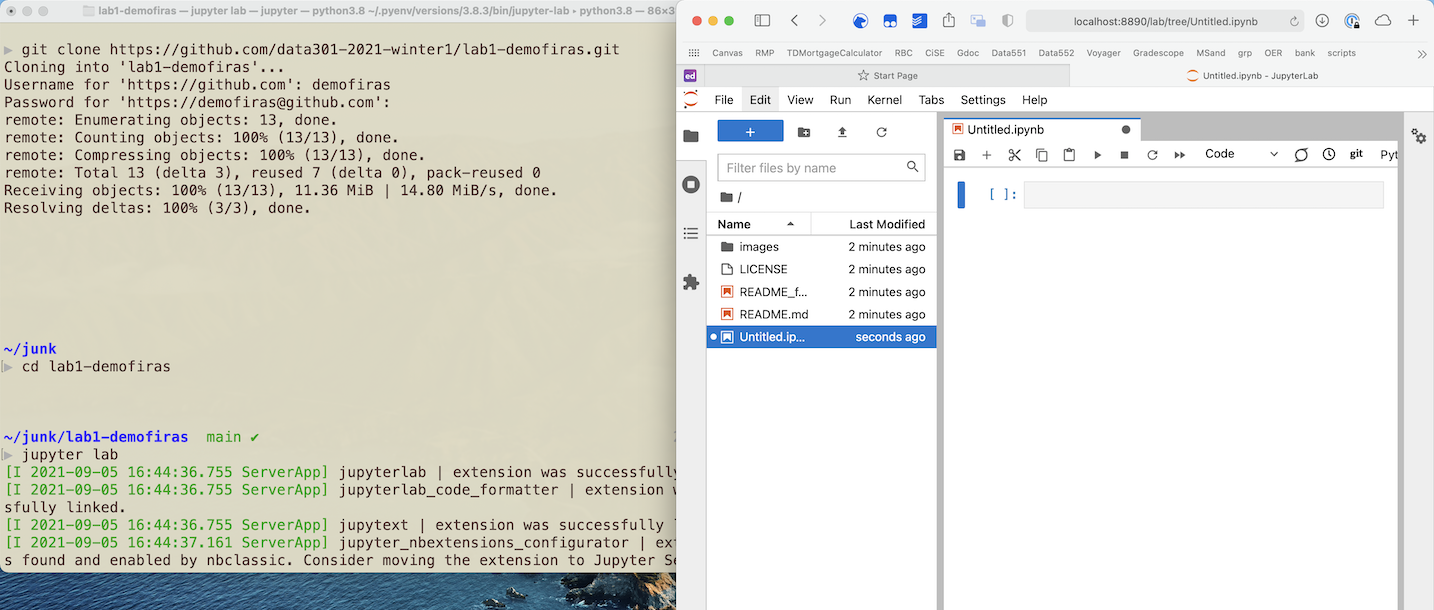
Once you are done cloning Lab1 and have completed the installation instructions, you will need to include a screenshot of a Terminal window, running a Jupyter Lab session locally on your computer, with a Python 3 kernel to get full marks for this portion.
Add the screenshot to the repository (in the main Lab1 directory is fine).
Here is an example of the type of screenshot we are looking for.
Your screenshot must include:
A) a Terminal (GitBash on Windows) window showing you cloning your repository AND
B) running jupyterlab AND
C) A new Python notebook (click on “Python” to create a new Python notebook).
Remember to adjust the name of your screenshot file (it should match exactly, including the extension.
Mine is .png, yours could be a jpg, or bmp or tiff) and add your own commit message):
git add screenshot.png
git commit -m "Added Jupyter Lab screenshot"
git push
Onwards to Task 2!