Milestone 2 - Data Analysis and Git
In this milestone you will be expected to process and clean your dataset, do exploratory data analysis (EDA), create some data visualizations, and work with method chaining in Pandas. If you are working as a group, you will be expected to show proficiency in all the areas above, without a duplication of efforts.
Due Date
The tentative due date for this milestone is Friday November 13, 2020. I suggest you try to meet at least two or three times during the next two weeks to discuss this milestone.
Overall Expectations
You should be committing to git every time you work on this project.
On average, all team members should be contributing to the project equally!
git commit messages should be meaningful. These will be marked. It’s OK if one or two are less meaningful, but most should be.
Use GitHub issues to communicate and document major decisions
Your question, analysis and visualizations should make sense. It doesn’t have to be complicated.
You should use proper grammar and full sentences in your READMEs. Point form may occur, but should be less than 30% of your written documents.
You must use proper English, spelling, and grammar.
You should write concisely.
Task 1: Introduction to Markdown (5%)
You may already know of this, but Jupyter Notebooks are an extremely powerful tool to help you create executable, and human-readable documents that contain code, text/narrative, images/plots, and longer explanatory paragraphs.
Here is a list of elements that are available in markdown:
Multi-level Headers (``,
##,###,####etc…)Bold text (surround with
**bold text**)Italic text (surround with
*italic text*)Unordered lists (
- textor* text,+ text)Ordered lists (
1. text)Images (
![path_to_image.png])Code (surround code in markdown cells with
single lineormulti-line code)Quoted text (start line with
> text)Links (
[text placeholder](https:/cbc.ca))Math symbols using $\(\latex\)\( (surround with `\)\(` like: `\)$\lambda`)
Horizontal Line (three dashes:
---)
There are two parts of this Task:
You should use at least three of the above elements somewhere in all the various README files that exist in your project.
Each person in a group (in their analysis folder) should have a notebook demonstrating the use of at least three of those elements so we know you know how to use markdown in your projects.
I am expecting everyone to get 100% on this task!
Additional Information
Here is a nice guide from GitHub about using Markdown in git repositories.
Task 2: Introduction to Git merges, branches, and more (0%)
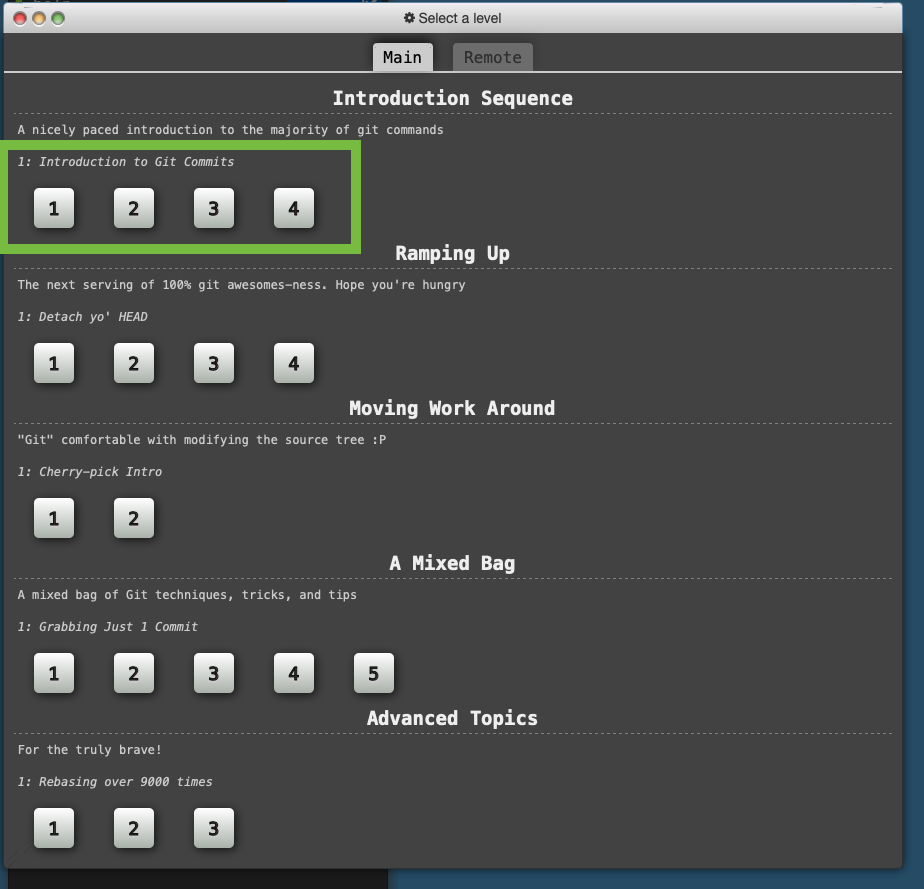
After many years of searching, I have found the PERFECT tutorial to help you get more familiar with git commands, particularly branching, and merging - things you will start encountering when you start collaboratively working on the projects. Rather than make this a milestone task though, I will be including it as Lab 5. It’s included here so you know that you should do this part of the lab before proceeding to Task 3 onwards. You are responsible for completing the following modules (at minimium):
“Main: Introduction Sequence” <- This should mostly be review
Exercise 1
Exercise 2
Exercise 3
Exercise 4
“Remote: Push & Pull – Git Remotes”
Exercise 1
Exercise 2
Exercise 3
Exercise 4
Exercise 5
Exercise 6
Exercise 7
Exercise 8
I am super excited about it (it’s almost as exciting as bashcrawl from Lab 2).
Task 3. Method Chaining and Python Programs (25%)
By now you probably have done several steps to load, clean, process, wrangle your data, and then save it to disk, in a notebook.
You will now use “method chaining” to re-do those steps in fewer lines, and more compact code in new (cells) within your Jupyter Notebook.
Once you are confident that your method chain works as expected, you will then move it to a separate .py file and then run the file from within your notebook.
An example of this will be shown in Lab 5.
Here are the steps you need to take:
Step 1: Build and test your method chain(s)
Method chaining allows you to apply multiple processing steps to your dataframe in a fewer lines of code so it is more readable. You should avoid having too many methods in your chain, as the more you have in a single chain, the harder it is to debug or troubleshoot. I would target about 5 methods in a chain, though this is a flexible suggestion and you should do what makes your analysis the most readable and group your chains based on their purpose (e.g., loading/cleaning, processing, etc…).
This article has a nice tutorial on method chaining.
Adapted from another article, here is an example of method chaining (description below the code):
import pandas as pd
import numpy as np
from sklearn.datasets import load_wine

data = load_wine() # this a data file that gets loaded

# Method chaining begins

df = (
    pd.DataFrame(data.data,columns=data.feature_names)
    .rename(columns={"color_intensity": "ci"})
    .assign(color_filter=lambda x: np.where((x.hue > 1) & (x.ci > 7), 1, 0))
    .loc[lambda x: x['alcohol']>14]
    .sort_values("alcohol", ascending=False)
    .reset_index(drop=True)
    .loc[:, ["alcohol", "ci", "hue"]]
)

df
The code above starts with loading the data, then renaming color intensity for its shorter form ci. It then creates a new column ‘color filter’ based on values on hue and ci, using the
assignfunction. It then filters a wine that has an alcohol content of more than 14. In the end, it sorts the data frame based on alcohol content and displays the columns that we are interested in. If the same were to be repeated without Method Chaining, a new data frame must be created and stored at each step.
Step 2: Wrap your method chain(s) in a function
A method chain converted to a function would like something like:
def load_and_process(url_or_path_to_csv_file):

    # Method Chain 1 (Load data and deal with missing data)

    df1 = (
          pd.read_csv(url_or_path_to_csv_file)
          .rename(...)
          .dropna(...)
          # etc...
      )

    # Method Chain 2 (Create new columns, drop others, and do processing)

    df2 = (
          df1
          .assign(...)
      )

    # Make sure to return the latest dataframe

    return df2
Within your Jupyter Notebook, test your function to make sure it returns the output you expect.
Step 3: Move your function into a new .py file
Inside your
analysisdirectory, create a new directory calledscripts; you will place any.pyfiles from your project within this directory.Create a new file
project_functions.py(or other suitable name) and add the module imports you may need (pandas,numpy, etc…).Copy the
load_and_processfunction into theproject_functions.pyfile.Save the file.
Add and commit it to your repository.
Push it up to GitHub so that your teammates can also see this file.
Each member of a group should now create a new Jupyter Notebook file (in their analysis folder)
importtheproject_functionsfile, and use theload_and_processfunctionA Jupyter Notebook cell should look something like:
from .. import project_functions # This is called a relative import
df = project_functions.load_and_process(url_or_path_to_csv_file)
df
Congratulations! You have now written your first python module!
The advantage of this is that you can now more easily use the power of git to version your method chains.
You are welcome to add more custom utility functions to the project_functions file, especially those that your teammates will use.
This will reduce the need for you and others to repeat yourself, and allow you to build up your functions over time.
Additional Reading on Relative imports AKA “what did I just do?”
This article is a very comprehensive guide to importing files and functions in python. Much of this is beyond the scope of DATA 301, but for those interested and curious, that is a very useful resource.
Task 4: Conduct an Exploratory Data Analysis (EDA) on your dataset (30%)
If you are working in groups, each person should do their EDA separately and independently. You have chosen rich datasets and there should be plenty of different features for each of you to explore.
Note: The EDA task (Task 4) is different from the Analysis task (Task 5). The EDA is “exploratory” in nature, and is done at a superficial level to get counts of columns, limits, ranges, understand the data distribution, and a cursory look at the relationships between the columns. Think of it as a ‘quick and dirty’ analysis of your data in preparation for a more thorough analysis.
You should use the project_functions to store any functions (including method chains) rather than defining them in your notebook.
As a rough guideline, each EDA should:
Involve at least two columns/features of your dataset
At least three useful visualizations created by you (the more the merrier (within reason)!)
Some notes and commentary to help others see observations you find interesting.
Remember that the goal of the EDA is to understand and explore your datasets. Here are three examples or guides:
Task 5. Conduct your analysis to help answer your research question(s) (40%)
Armed with your EDA, you should now be ready to conduct a thorough analysis to answer your research question(s). This section can be completed together as a group (and only one file should be submitted) but you may (and are encouraged) to try this yourself first, and then combine them together in one submission.
Each group will have a different data analysis product, however some guidelines to keep you on the right track:
You should remain focused on your research question(s) - it is very easy to get lost down rabbit holes in data analyses projects.
If you find that your research questions are not that interesting, or you find more interesting questions (especially after your EDA) you may revise them, or add more.
Use the lab times, as well as our office hours (TAs and instructors), to get help and guidance on your analyses.
You should experiment with “plenty of” data visualizations to try and visualize your dataset and answer your research questions.
Give us a narrative/story of your explorations as you go along, in-line with your data - use the new Markdown skills you learned in Task 1!
Working collaboratively in GitHub
As we progress through the course, you will be learning more and more about GitHub and how to work collaboratively on code. Since this is the first time many of you are using Git, I recommend that if you are working in a group, you avoid editing each others’ files until you are more familiar with git. Below are a few things you may find useful as you continue your git journey.
Git Branches
Git branches were introduced in Milestone 2.
Pull requests
Once you have created a branch and “completed” a feature, it’s time to merge the feature back to the main (or master) branch.
Of course, as you learned in the tutorial you can do this yourself, but in general it’s a good idea for another teammate to review your work before it is merged into master.
This is where Pull Requests come in:

To create pull requests (even students working solo can do this), you can follow Steps 4 and 5 from here, and then assign a reviewer (from your group) to look at your code.
Git Issues, Milestones, Labels, and Assignees
From GitHub’s documentation:
Issues are a great way to keep track of tasks, enhancements, and bugs for your projects. They’re kind of like email—except they can be shared and discussed with the rest of your team. Most software projects have a bug tracker of some kind. GitHub’s tracker is called Issues, and has its own section in every repository.

Labels are a great way to organize different types of issues. Issues can have as many labels as you want, and you can filter by one or many labels at once.

Milestones, are groups of issues that correspond to a project, feature, or time period. People use them in many different ways in software development.

Assignees are a great way to filter, categorize issues, and remember what you’re responsible to do. Each issue can have an assignee — one person that’s responsible for moving the issue forward. Assignees are selected the same way milestones are, through the grey bar at the top of the issue.

You can change or add a milestone, an assignee, and labels by clicking their corresponding gears in the sidebar on the right.
How to pull the most recent changes to your computer
If you edit your code on the GitHub web interface, or if another user commits to your repository, to update the repository with the most recent changes, you should always start a working session by running this command in your git repository (using either Terminal or GitBash):
git pull
This will make sure your local computer is updated with any changes. Commit and push your changes often while you work to stay in sync.