Task 1 - Introduction to the Submission Workflow#
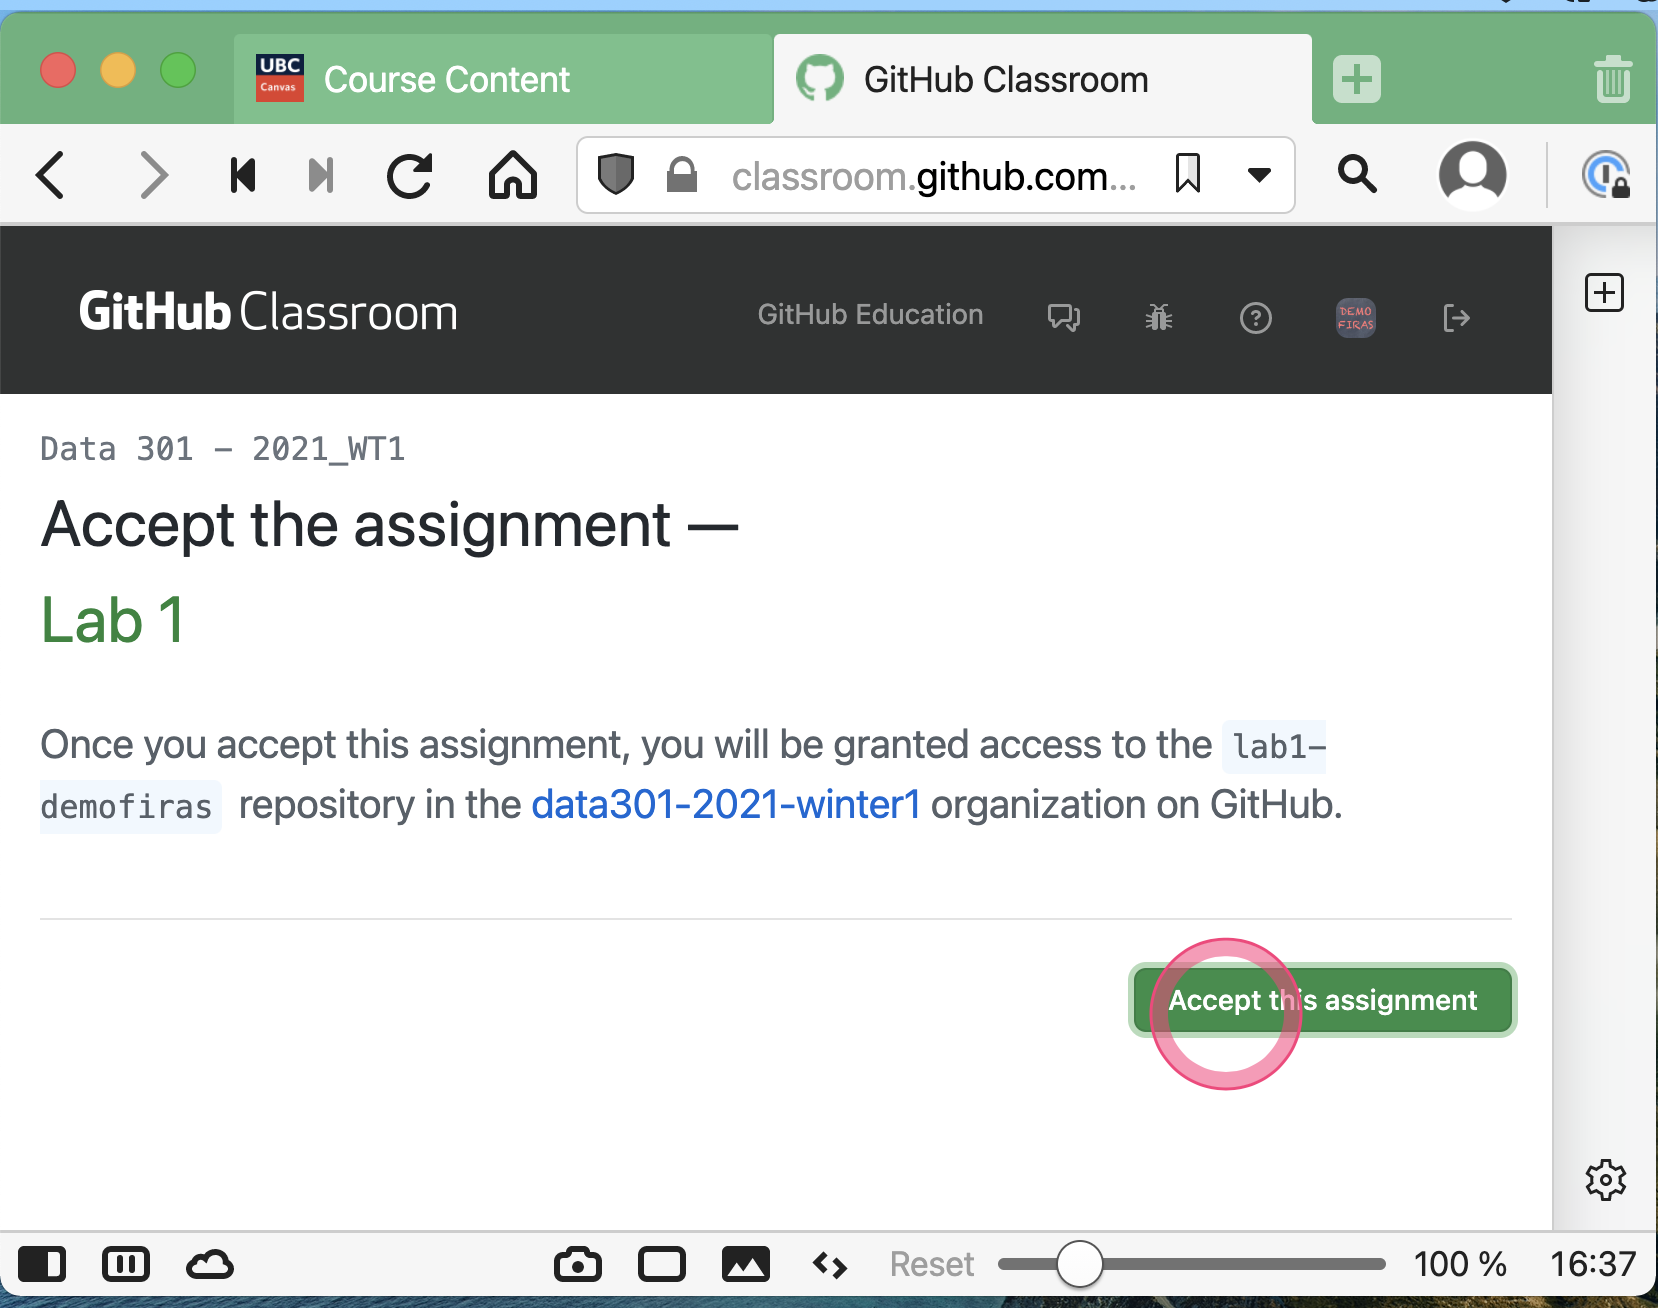
Task 1.1: Accept the lab assignment#
You will find the link to accept the lab on Canvas, under “Course Content” and then “GitHub Links”.
You can get your clone URL from GitHub:
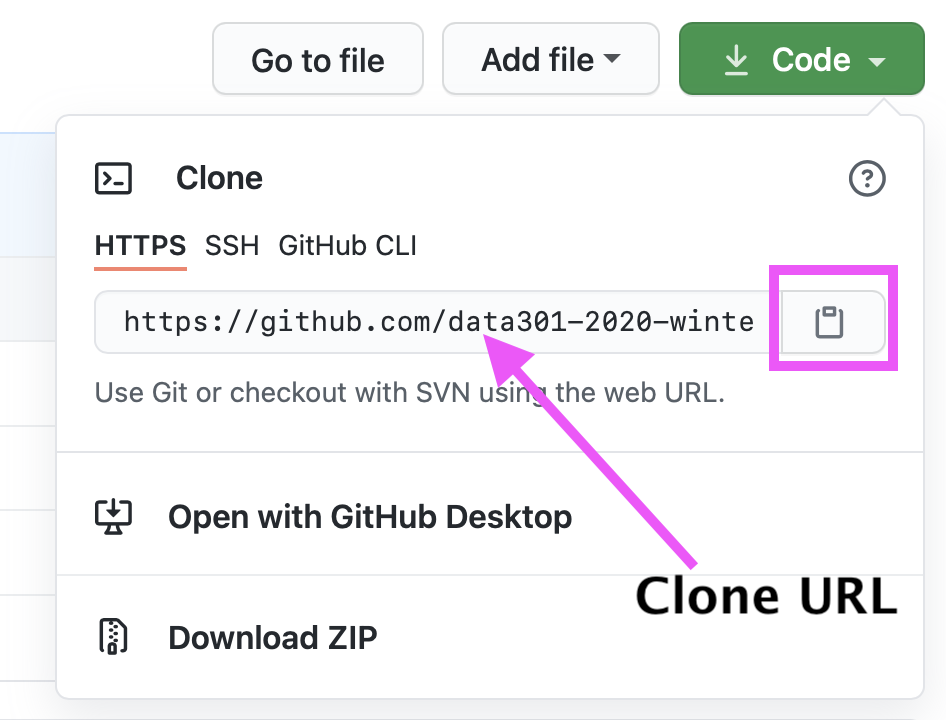
Task 1.2: Use the clone URL and clone the Lab 1 repository on your local computer and navigate to that directory#
Open a new Terminal - when you do, generally you will start in your home directory (on Windows this will be
C:\Users\yourusername\and on macOS and Ubuntu this wil be/Users/yourusername). You can check your home directory by typingpwd(print working directory) and hitting enter.
To navigate to a new directory, you will need to use the
cdcommand and use tab-completion to find the directory on your computer where you cloned this lab:
cd ~/school/year1/cosc123/lab1-github-username
Note: you may choose a different directory structure, based on how you keep your coursework organized on your machine. If you do not currently organize your coursework in a particular way, I suggest using the structure above.
You will then need to clone the GitHub repository somewhere locally (I suggest a directory structure like the one I above):
git clone https://github.com/cosc123-2022-WT2/lab1-YOUR_USER_NAME.git
Task 1.3 - Open the lab in VS Code#
Though it is possible to open individual files in VS Code (a code editor), it is usually preferred to open the entire folder in VS Code. You can do this in one of two ways:
Option 1: Using mouse clicks#
You will need the location where you cloned the lab.
Open VS Code.
Click
File, and thenOpen Folder.Find the location where you cloned the lab, and then open it.
Option 2: Using the Terminal#
There are only two steps (after you clone the repo):
You will need to change directory where you cloned the lab:
cd
lab1-demoFiras(substitutedemoFiraswith your username).code .will open VS Code in the current directory.
Task 1.4 - Use the markdown Previewer#
While you practice with Markdown syntax, it is useful to see a “Preview” of what it will look like. Here’s the effect of the preview extension you installed in VS Code:
Task 1.5 - Add information to your activity.md file#
In this repository, there is an empty file called ‘activity.md`. Your task is to add markdown elements to this file using VSCode.
In this new file called
activity.md, add a header of Level 1 called “Lecture Activity 1”.Commit the change, add a comment about what it is.
Edit the
activity.mdfile, and answer the following questions - each question should be a level 2 heading:Have you ever used GitHub before? Yes/No
Explain - in your own words - what you think is meant by “version control” (you’re welcome to look it up, just don’t plagiarize!)
Explain - in your own words - what you think is the difference between Git and GitHub.
That’s it! You’re all done this Activity.