Lab 1A - Markdown and Git
In Lab1A, I will ask you to do several things that will guide you through some of the course tools we will be using. You can likely do the tasks in any order, but I suggest doing them in the suggested order.
Task 1 - Set up your computer
First, you should follow the install instructions on the course website.
Below are the instructions for you to continue installing software on your system. We will need this for the first python lecture this week.
Getting Started
Once you are done with the install instructions, you can get started with the rest of Lab 1.
Step 1: Accept the lab assignment You can find the link to accept the lab on Canvas, under “Course Content” and then “Lab Links and Solutions”.
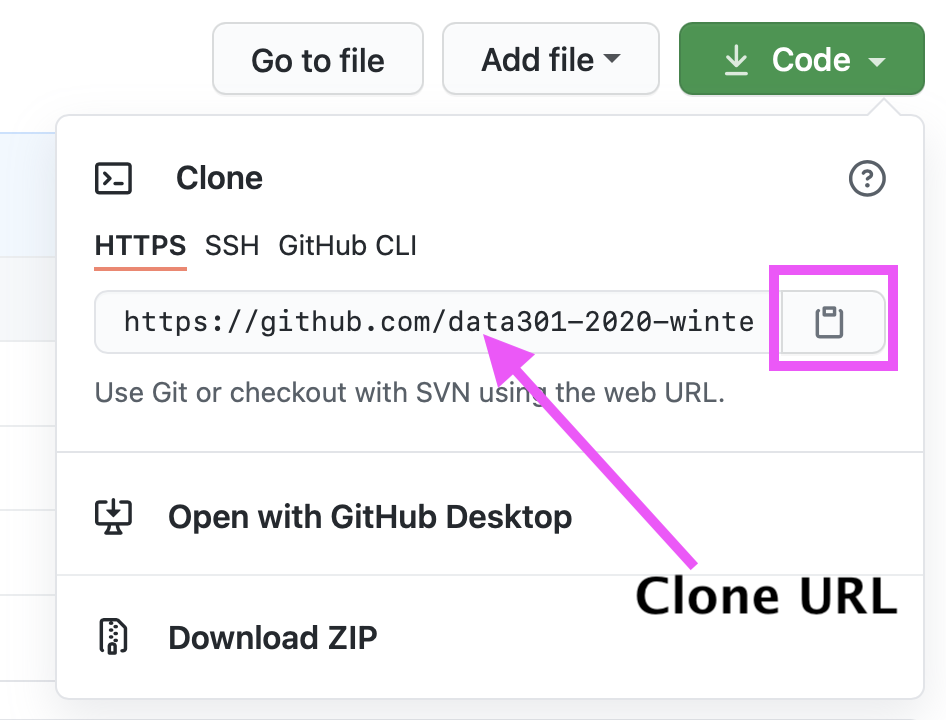
You can get your clone URL from GitHub
Step 2: Use the clone URL and clone the Lab 1 repository on your local computer and navigate to that directory
Open a new Terminal - when you do, generally you will start in your home directory (on Windows this will be
C:\Users\yourusername\and on macOS and Ubuntu this wil be/Users/yourusername). You can check your home directory by typingpwd(print working directory) and hitting enter.
To navigate to a new directory, you will need to use the
cdcommand and use tab-completion to find the directory on your computer where you cloned this lab:
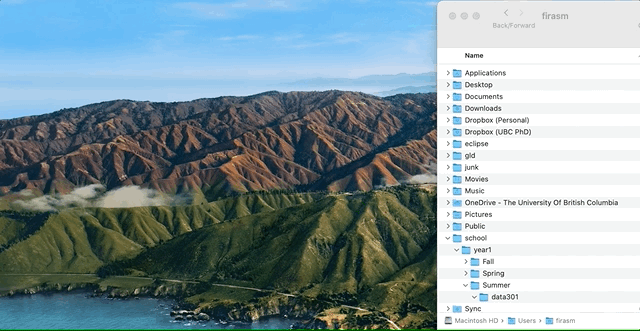
cd ~/school/year1/Summer/data301/lab1-github-username
You will then need to clone the GitHub repository somewhere locally (I suggest a directory structure like the one I above):
git clone https://github.com/data301-2021-summer2/data301-lab1-YOUR_USER_NAME.git
Add, commit, and push your changes to GitHub
Once you are done cloning Lab1 and have completed the installation instructions, you will need to include a screenshot of a Terminal window, running a Jupyter Lab session locally on your computer, with a Python 3 kernel to get full marks for this portion.
Add the screenshot to the repository (in the main Lab1 directory is fine).
Remember to fix the name of the file (it should match exactly, including the extension. Mine is .png, yours could be a jpg, or bmp or tiff) and add your own commit message):
git add screenshot.png
git commit -m "Added Jupyter Lab screenshot"
git push
Onwards to Task 2!
Task 2 - Learning Markdown
Markdown is a very useful “markup” language that is very popular in Data Science. Usually when you want to create a document, your first instinct is likely to open a Microsoft Word, Google Doc, Pages, LibreOffice Writer etc… In any of those word processor or typesetting programs, to add bold text, headings, italics, links, and other formatting you typically need to click buttons or find things in menus. This does not make it easy to collect a history of what has happened to every line in your document. Markdown strips away all the “frills” of a word processor and helps you focus on just the text. There are no fonts in Markdown (there is only one, the default) and you cannot do everything you can in a traditional spreadsheet program. But for 99% of the things that people who code have to write, Markdown is more than sufficient!
First, let’s get ready by creating a new file to practice in:
Creating a new file
Open a Terminal (GitBash on Windows) and navigate to this directory (
lab1A):
cd lab1A
This assumes you were already in your cloned Lab1 directory: ~/school/year1/Summer/data301/lab1-github-username; if you are not, you should get to it!
Create a new file called
activity.mdfile and open it in VS Code. You can do this in one line using this command:
code activity.md
If this does not open a blank file in VS Code, I suggest revisiting the install instructions to make sure that you can open VS Code from the Terminal
Practice Markdown Syntax
Practice adding the following Markdown elements into
activity.md:
Add a level 1 heading using “#”.
Add a level 2 heading using “##”.
Add a level 3 heading using “###”.
Add a level 4 heading using “####”.
Write a sentence (any sentence) after each of the four headings and sub-headings you created. You can generate and use random sentences here.
Make a single word in one of the sentences you wrote above bold by surrounding them in
**.Make a single word in one of the sentences you wrote above *italics by surrounding them in
*.Create an unordered list of your favourite fruits:
- Apple
- Banana
- Orange
- Strawberries
Create an ordered list of your favourite subjects amongst the following: Physics, Chemistry, Biology, Math, Computer Science, English, Literature.
1. Physics
1. Computer Science
1. Literature
1. English
1. Math
1. Chemistry
1. Biology
Write a line of code “in-line” with a sentence like this:
print('hello world')Write a block of code after a sentence like this:
num =  10
if num < 5:
    print('Number is less than 5.')
else:
    print('Number is greater than 5.')
Add a horizontal line using
---.Add a clickable link in the
activity.mdfile like this: link text.Add a local (i.e. on your computer/repository) image to this file like this:

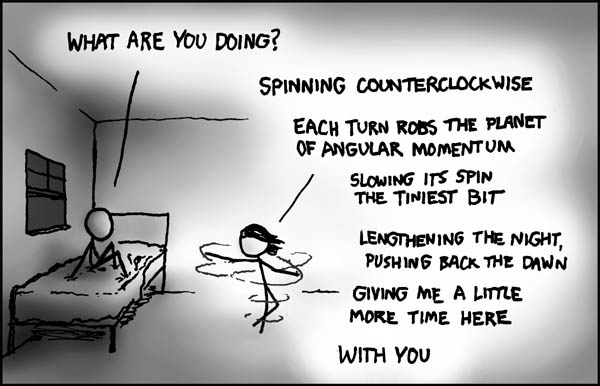
Add an image linked from the internet, for instance this xkcd comic:

Add a table of your favourite fruits (make sure to have at least 4 rows), their colour, shape, and size using Markdown syntax like this:
| Fruit | Colour | Shape | Size |
| ----- | ------ | ----- | ---- |
|       |        |       |      |
|       |        |       |      |
|       |        |       |      |
Add, commit, and push your changes to GitHub
Add, commit, and then push your changes to GitHub.com using the following commands (we will talk about what exactly this means next time):
git add .
git commit -m "Finished markdown syntax."
git push
That’s it! You’re all done this section!
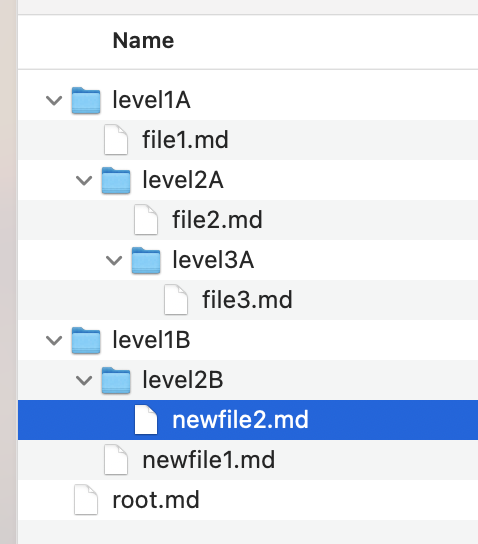
Task 3 - Reproduce this structure in your repository
Start by creating a directory called Task3 inside lab1A.
If you followed the suggested directory structure, this directory should be here: ~/school/year1/Summer/data301/lab1-github-username/lab1A/Task3
The files should be named the same way, but you can leave them empty if you want.
You will need the following commands:
cd: change directorypwd: print working directorymkdir: make directoryls: list directory contentstouch: create an empty file with a specific namecode/pico/nano/vim: edit the file in a text editor
Add, commit, and push your changes to GitHub
git add .
git commit -m "Finished markdown syntax."
git push
You are now ready to move on to lab1B!