PrairieLearn Course Development on Docker#
This page describes the procedure to install and run your course locally within Docker. The steps listed below only need to be done once, once you’ve got things setup correctly, you should refer to the Question Development page for subsequent questions.
Step 1: Ensure Docker is installed on your machine#
Before you start, make sure the Docker application is installed and running.
To confirm Docker is working, open a Terminal and run the following:
docker --version
You should get an output similar to:
Docker version y.y.y, build yyyyy
If this doesn’t work, visit the Docker section in the setup guide for macOS, or Windows.
Step 2: Pull the PrairieLearn Docker container#
Open a Terminal, and run the following to pull the PrairieLearn image:
docker pull prairielearn/prairielearn
On an M1/M2 Mac, you will probably get an error like,
no matching manifest for linux/arm64/v8 in the manifest list entries
If so, set the platform to linux/x86_64 (because there isn’t an M1/M2 image yet) like this:
docker pull --platform linux/x86_64 prairielearn/prairielearn
It will take a few minutes to download (depending on your internet connection).
Step 3: Run PrairieLearn using the example course#
To Launch PrairieLearn locally, run the following command:
docker run -it --rm -p 3000:3000 prairielearn/prairielearn
Your Terminal will be occupied and while it’s launching, the message in the Terminal will say “Starting PrairieLearn…”. Once it’s launched, a message will print in the Terminal that says:
info: Go to http://localhost:3000;
visit that webpage in a new browser.
Your Terminal will still be occupied and you should keep it running.
To interrupt and stop the container, press Ctrl + C in the Terminal (you may have to do this several times).
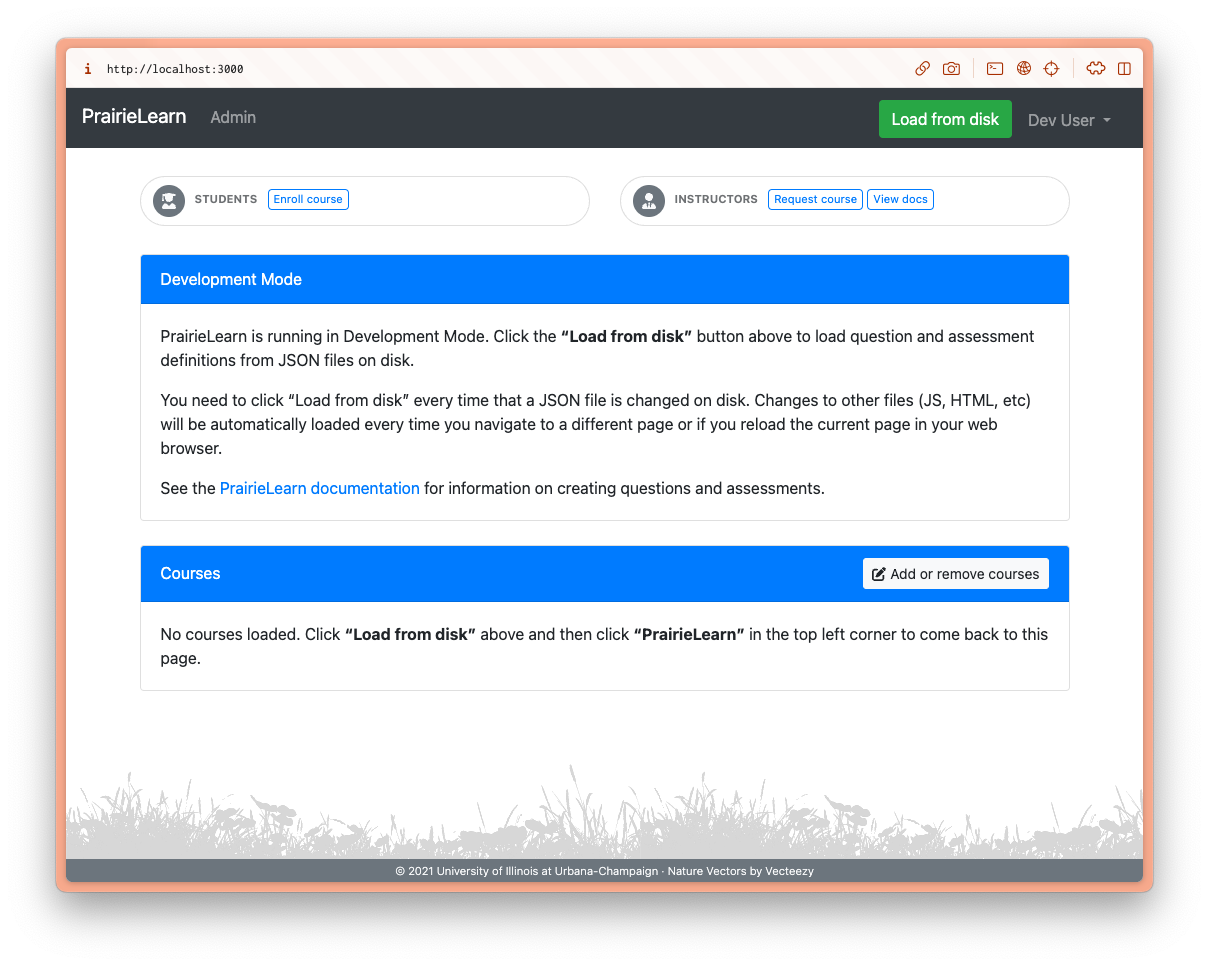
In a browser, here’s what you should see:
Step 4: Load the Example Course#
Every time you launch a PrairieLearn Docker container, you will need to load the list of courses.
By default, the PrairieLearn Docker image contains a directory named exampleCourse.
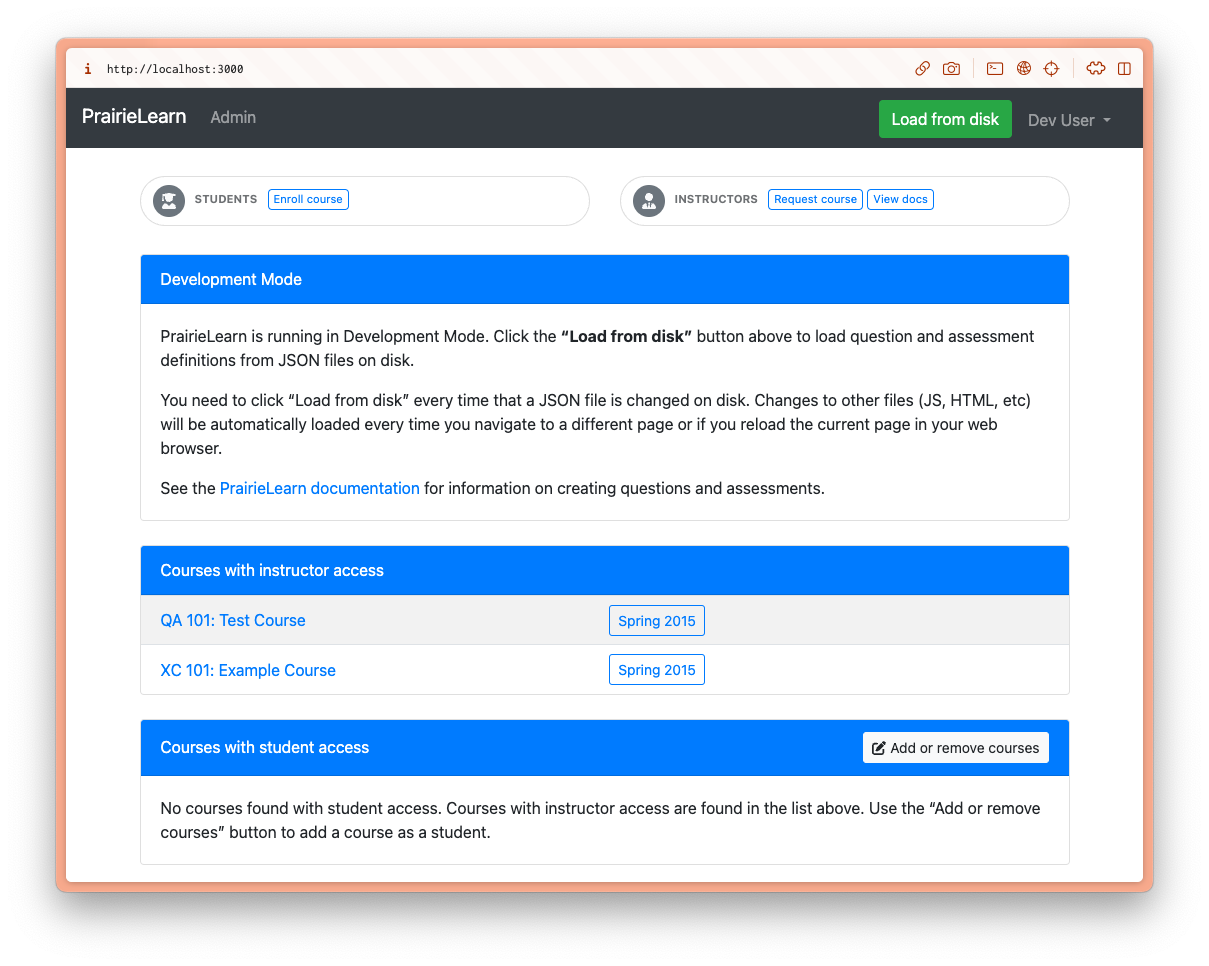
First, click on “Load from disk” above and then click “PrairieLearn” in the top left corner to come back to this page.
Once you return to the PrairieLearn home page, here is what you should see:
Step 5: Explore the Example Course#
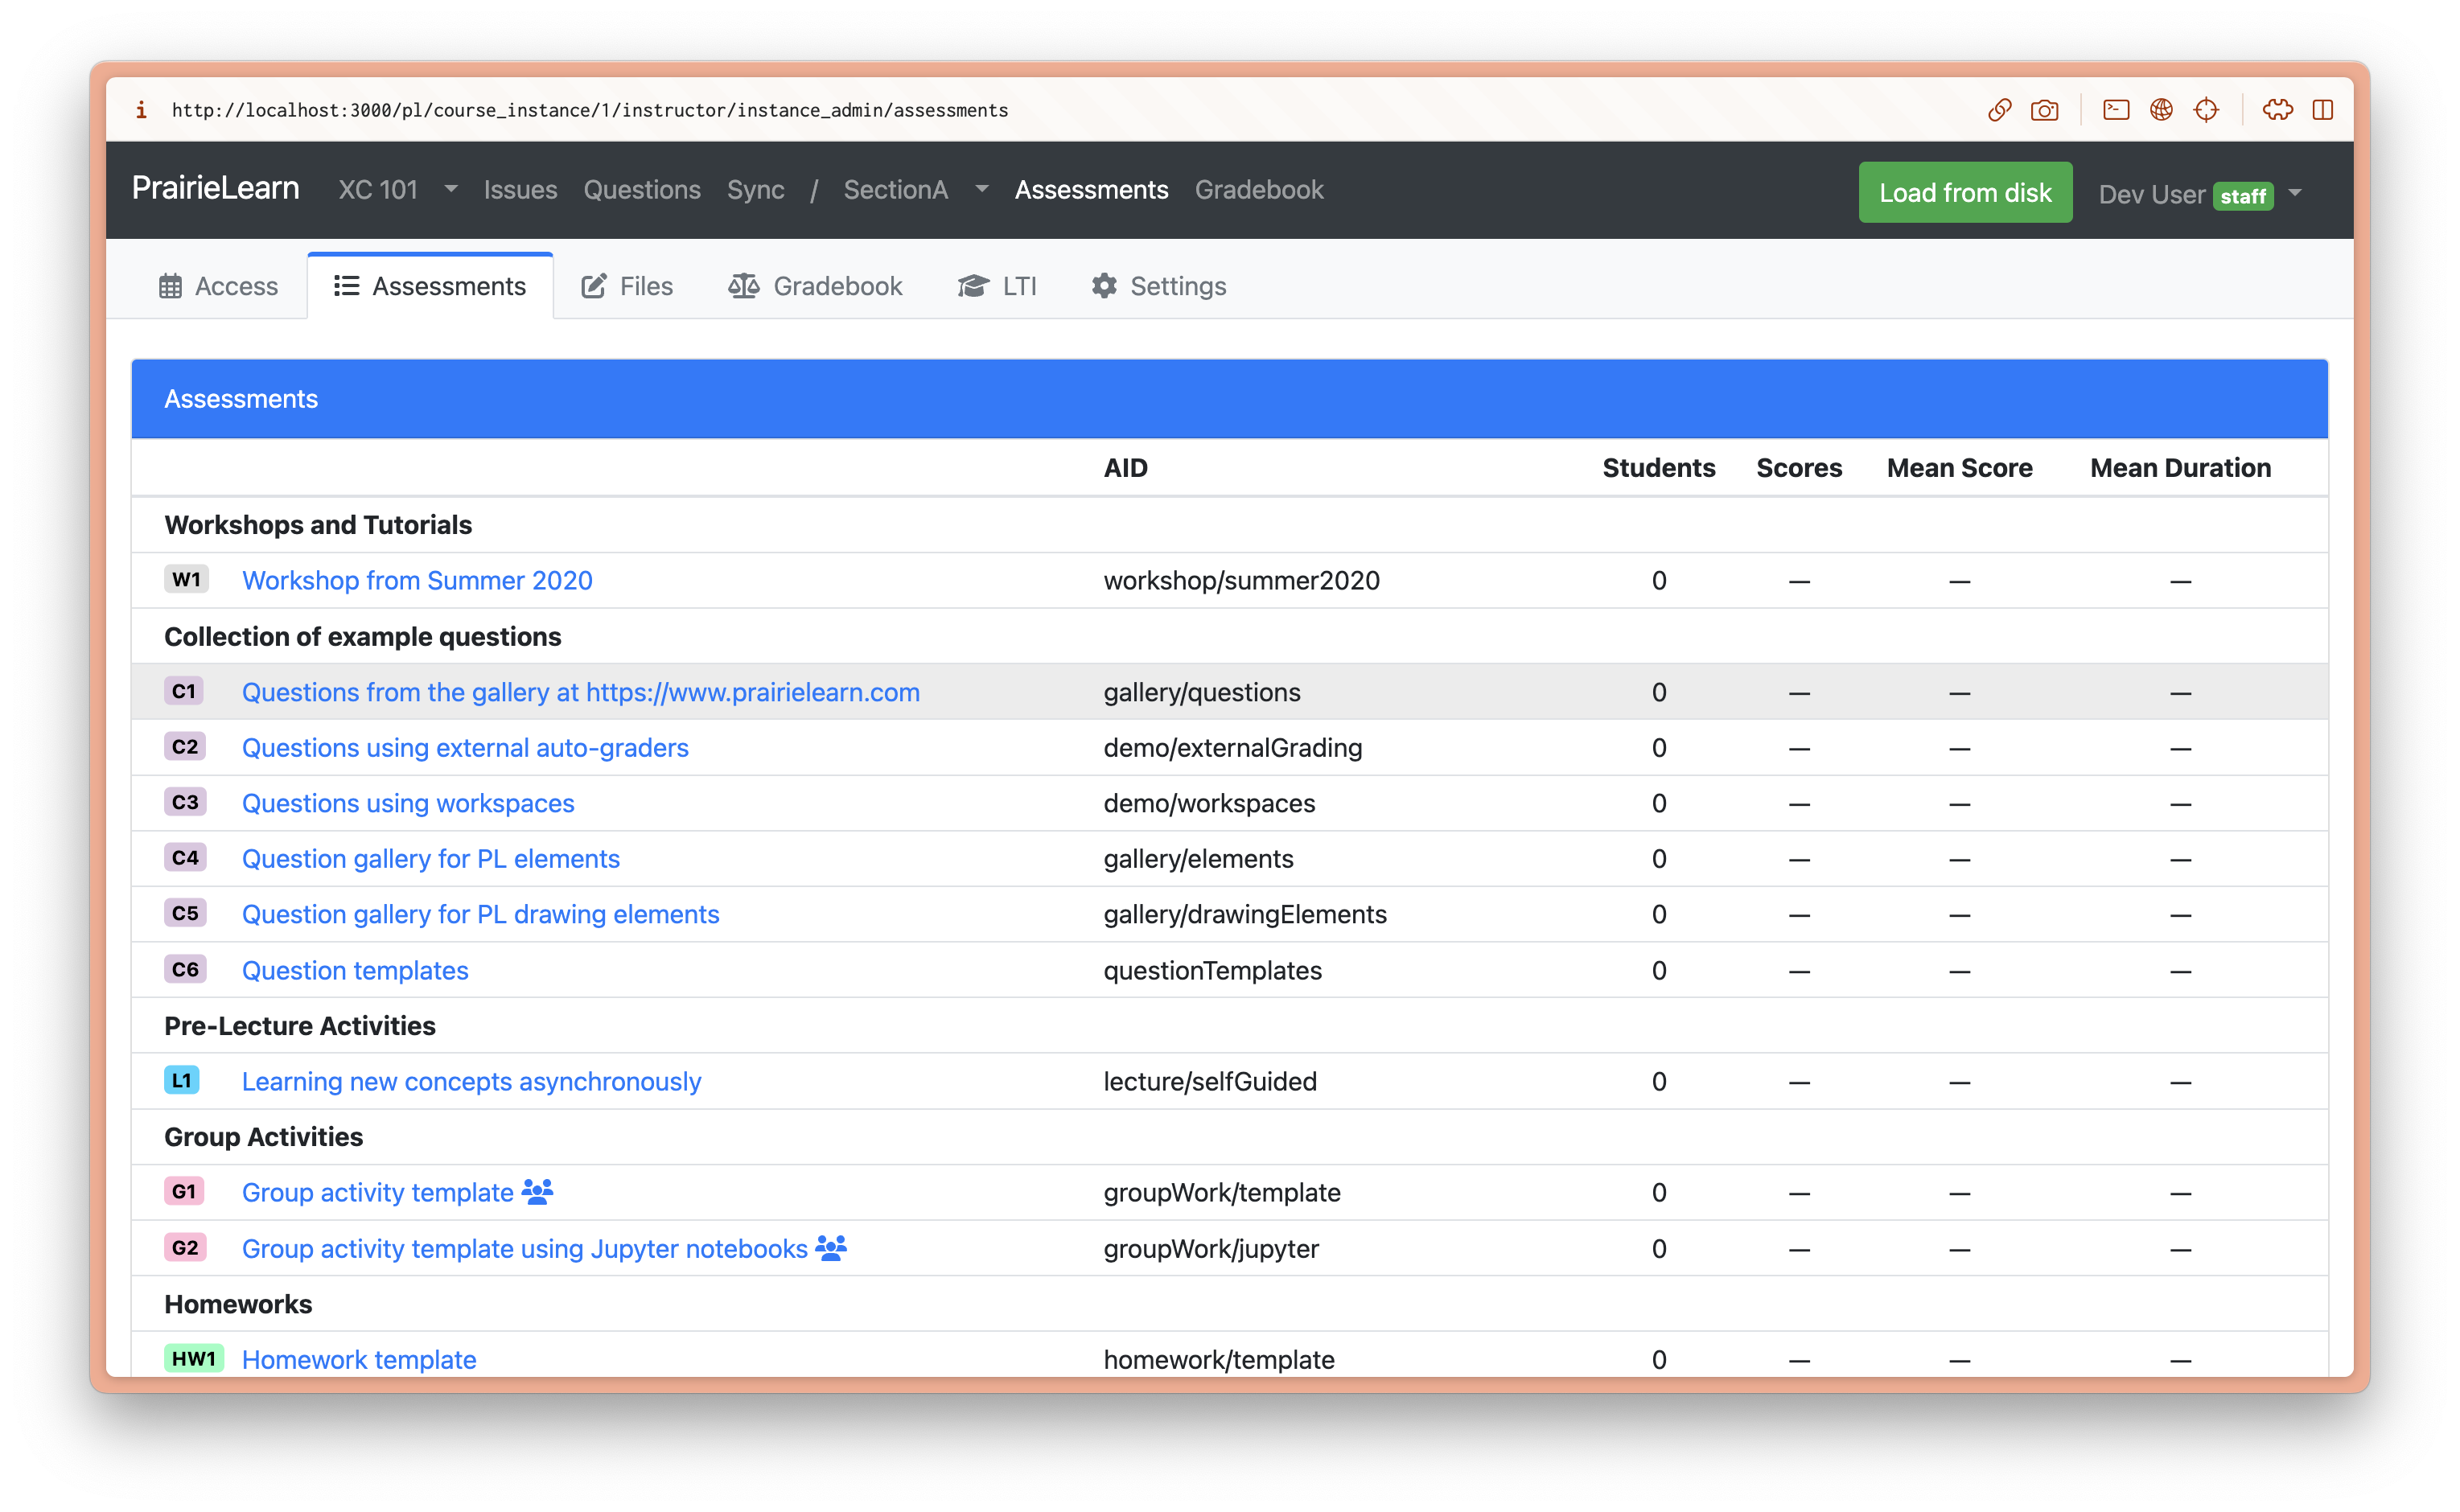
The example course contains many question and assessment types for you to explore. You can experience the questions within Assessments (as students would see it), or browse questions from the Question Bank individually using tags and topics.
Here is what the Assessments will look like.
For more details about the example course and how to author your own questions, see this section here.
Step 6: Stop the Docker Container#
Once you’re done exploring, stop the Docker Container (using Ctrl+C in the Terminal).
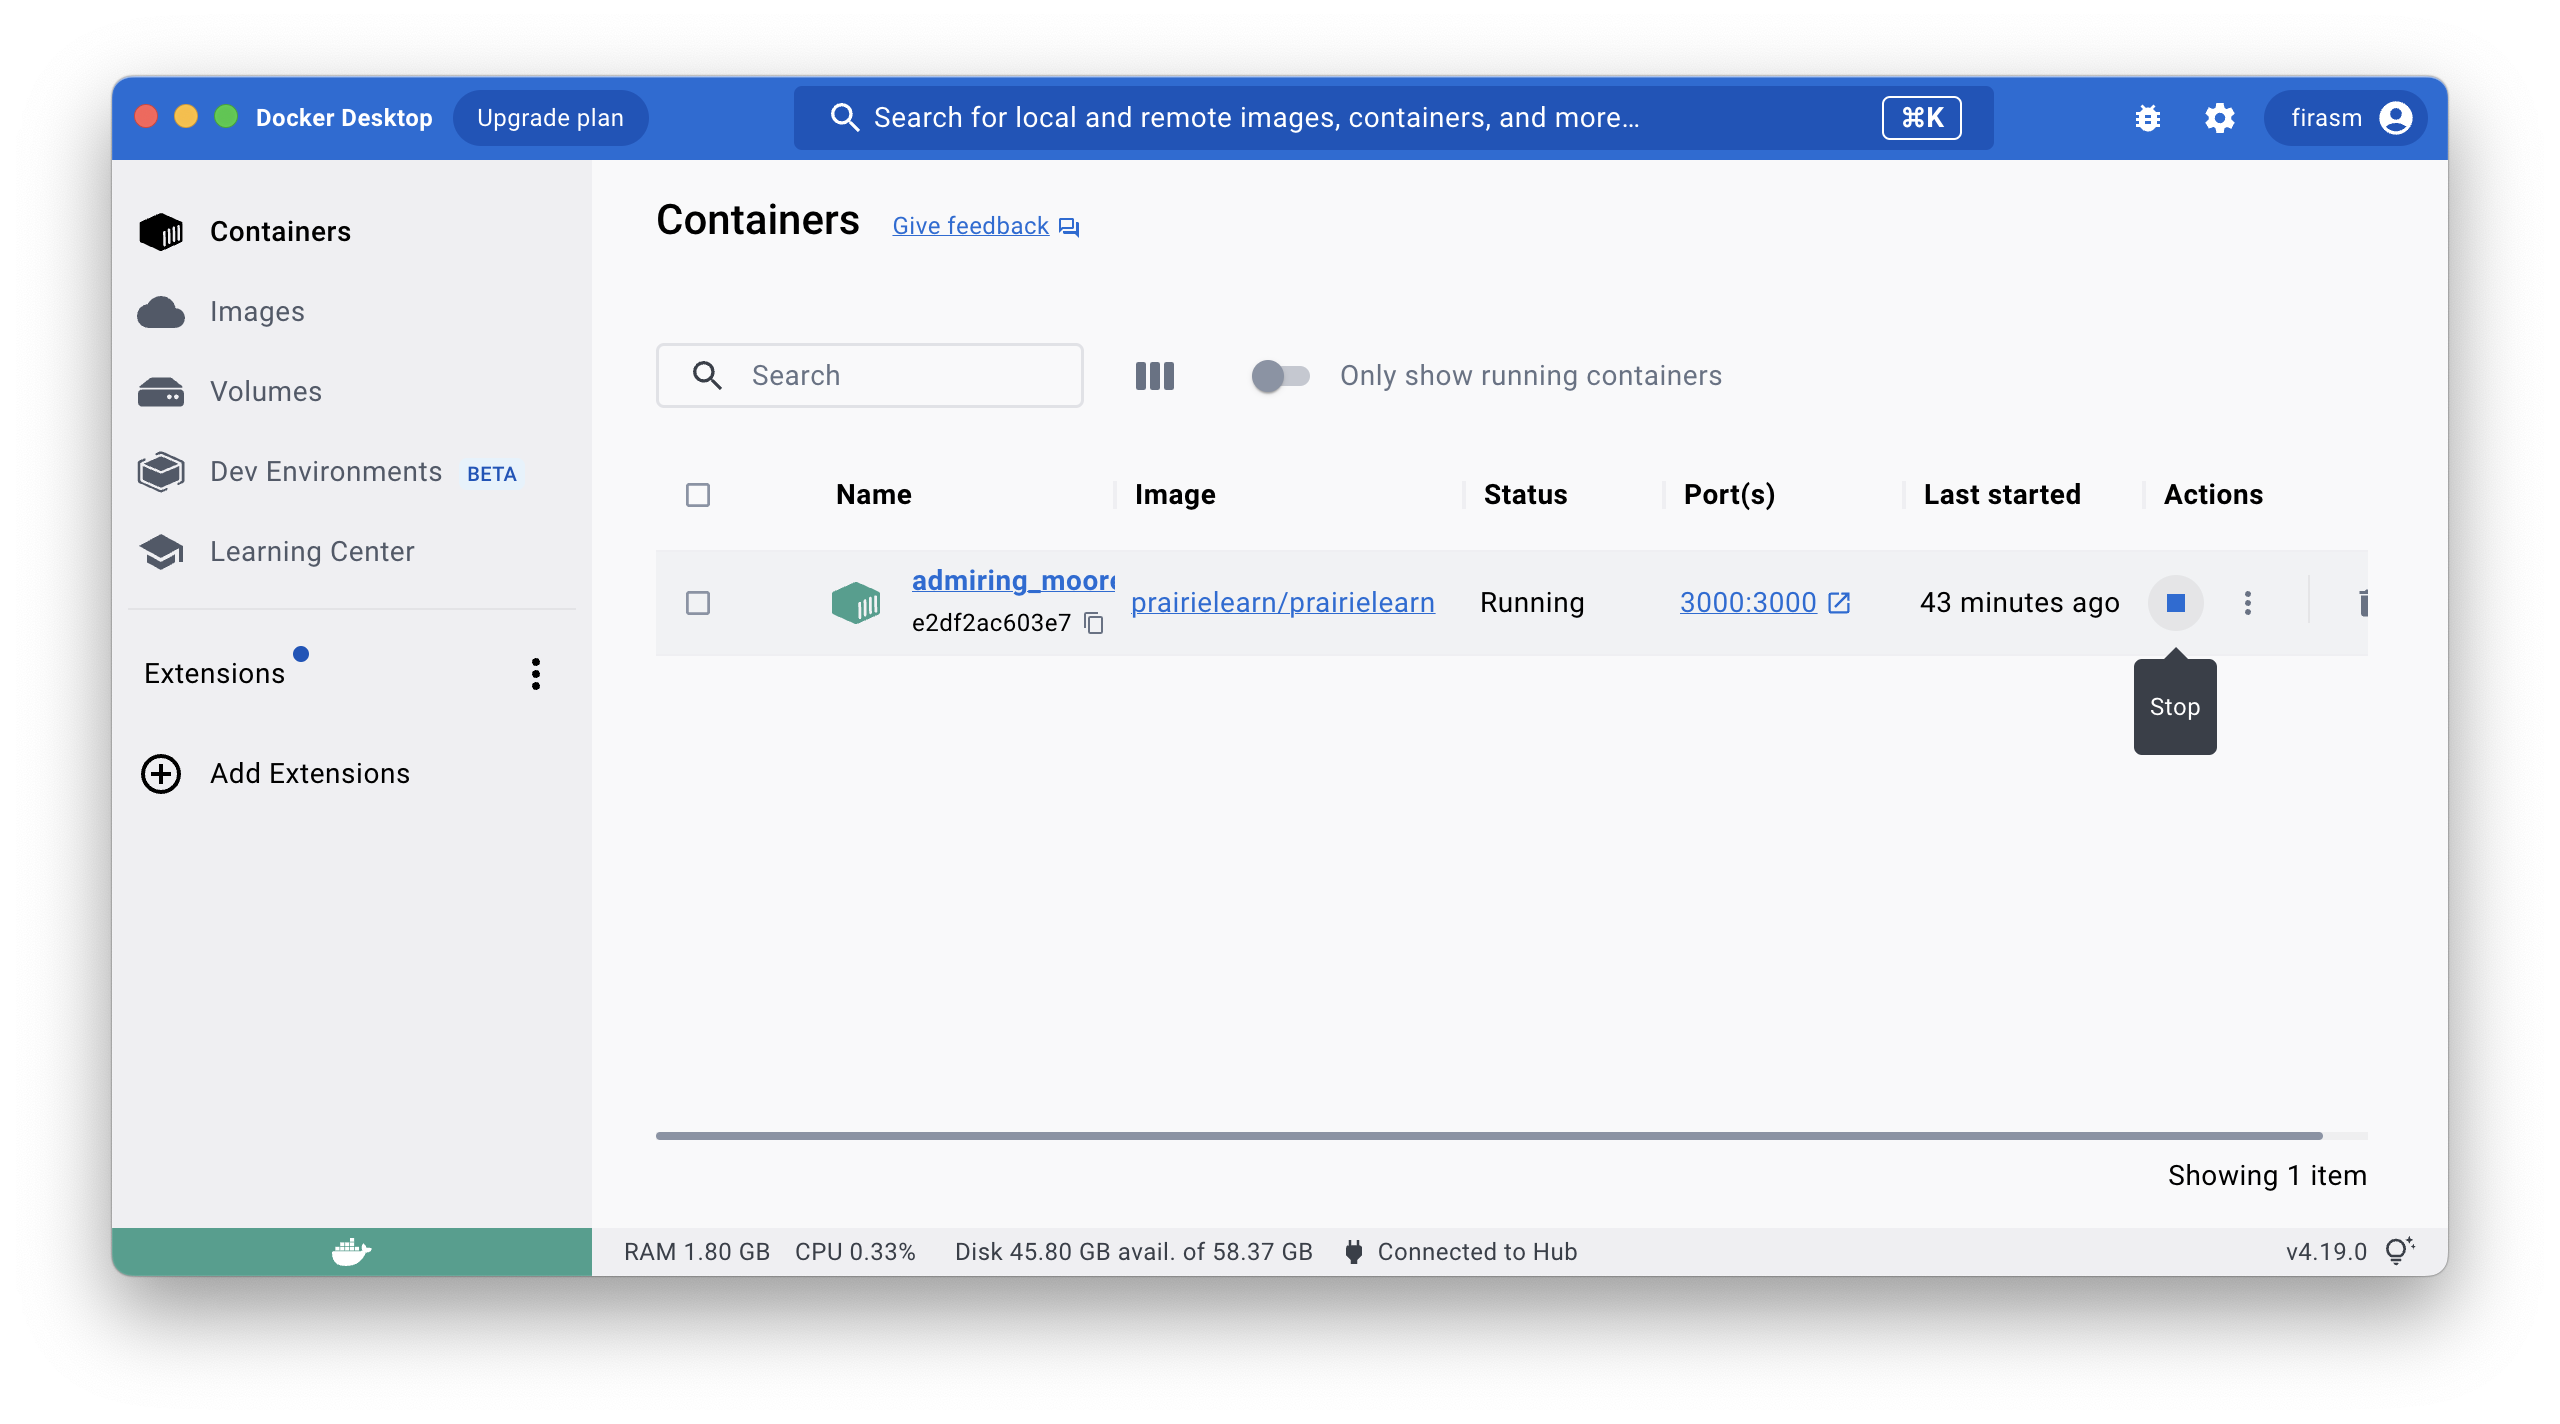
Another way to stop the Docker container is to open Docker Desktop and press the stop (⏹️) button.
Tip
This step is sometimes a bit finicky - your Terminal may stop responding when trying to stop the Container using Ctrl+C.
If that happens, don’t close the Terminal, and use the Docker Desktop to stop the container.
Step 7: Fork the IND 100 sample PrairieLearn course#
If you haven’t already done this, follow the steps outlined here.
Step 8: Add your own course to the local PrairieLearn instance#
To use your own course, bind the Docker /course directory with your own course repo directory using the -v flag.
In the command below, replace local_path with the path to where your course repo is cloned locally:
docker run -it --rm -p 3000:3000 -v local_path:/course prairielearn/prairielearn
Tip
For staff working on the Open Problem Bank, your local_path should be the absolute path wherever you cloned the IND 100 (pl-opb-ind100) and the instructor_subject_bank repositories.
For example, the exact command for me is:
docker run -it --rm -p 3000:3000 -v ~/Sync/EL/OPB/course_dev/pl-opb-ind100:/course prairielearn/prairielearn
Tip
If you are using Docker for Windows then you will need to first give Docker permission to access the C: drive (or whichever drive your course directory is cloned in).
This can be done by right-clicking on the Docker “whale” icon in the taskbar, choosing “Settings”, and granting shared access to the C: drive.
To use multiple courses, add additional -v flags (e.g., -v /path/to/course:/course -v /path/to/course2:course2).
There are nine available mount points in the Docker: /course, /course2, /course3, ..., /course9.
If you’re in the root of your course directory already, you can substitute %cd% (on Windows) or $PWD (Linux and MacOS) for /path/to/course.
Step 9: Run the script to move a question from the instructor_subject_bank to IND 100#
Since we are writing questions for the OPB using MyST Markdown (more details about this later), there is an extra processing step to convert the .md file to the PrairieLearn format (.html, .json, and .py files).
This processing step is somewhat automated using GitHub Actions, but it’s often helpful to do the processing locally since it takes much less time and is more efficient when troubleshooting.
Here are the steps to run the processing step on an .md question to create .html, .json, and .py files, and then move them over to the IND 100 and see how the question looks.
Open a Terminal on your local machine, and change directory to where the
instructor_subject_bankis cloned.cdinto thescriptsdirectory.Run the script on a particular question:
python checkq.py ../source/001.Math/Algebra/Smudge/Smudge.md --output_root=../../pl-opb-ind100/questions/FM
Open the local instance of PrairieLearn in your browser (http://localhost:3000).
Click “Load from Disk”.
Verify the question works as expected on PrairieLearn in the browser.
Important
When developing locally on PrairieLearn, you must click “Load from Disk” every time you make a change in your questions directory!

That’s it! You’re ready to develop questions for the OPB!
Setting up local autograder container#
For development of questions that require an autograder, you will need to set up a local autograder container as well.
Important! (Windows Only)#
If you are using Windows, the following commands will need to be executed in Windows Subsystem for Linux (WSL). You can do this two ways:
Open a command prompt and type
wslto open a WSL terminalLook for the Windows Subsystem for Linux application in the Start Menu
Step 1: Create a local directory for the autograder#
To run PrairieLearn locally with external grader and workspace support, create an empty directory to use to share job data between containers. This directory can live anywhere, but needs to be created first and referenced in the docker launch command. This directory only needs to be created once.
mkdir "$HOME/pl_ag_jobs"
Step 2: Run the PrairieLearn Autograder container#
Now, run PrairieLearn as usual, but with additional options. For example, if your course directory is in \(HOME/pl-tam212 and the jobs directory created above is in \)HOME/pl_ag_jobs, and you are using Linux or Mac OS X, the new command is as follows:
docker run -it --rm -p 3000:3000 \
    -v "$HOME/pl-opb-ind100:/course" `# Replace the path with your course directory` \
    -v "$HOME/pl_ag_jobs:/jobs" `# Map jobs directory into /jobs` \
    -e HOST_JOBS_DIR="$HOME/pl_ag_jobs" \
    -v /var/run/docker.sock:/var/run/docker.sock `# Mount docker into itself so container can spawn others` \
    prairielearn/prairielearn
If you are on Windows, you can use the following command on the WSL 2 shell:
docker run -it --rm -p 3000:3000 \
    -v "$HOME/pl-opb-ind100:/course" `# Replace the path with your course directory` \
    -v "$HOME/pl_ag_jobs:/jobs" `# Map jobs directory into /jobs` \
    -e HOST_JOBS_DIR="$HOME/pl_ag_jobs" \
    -v /var/run/docker.sock:/var/run/docker.sock `# Mount docker into itself so container can spawn others` \
    --add-host=host.docker.internal:172.17.0.1 \
    prairielearn/prairielearn
NOTE: When replacing the path with your course directory on Windows, make sure to use a POSIX-style path (e.g. /mnt/c/Users/username/pl-opb-ind100) and not the Windows path (e.g. C:\Users\username\pl-opb-ind100).
Note: Grader images#
When attempting a question with the autograder configured for the first time, the grader image will be automatically pulled by PrairieLearn. This may take a few minutes, but will only need to be done once. The grader image will be cached locally for future use. If PrairieLearn is unable to pull the grader image, it may be necessary to manually pull the image using the following command:
docker pull prairielearn/grader-python
Note: The above command is for the Python grader image. If you are using a different grader image, you will need to replace prairielearn/grader-python with the appropriate image name.
