Lecture 1 - The Terminal and Git
from traitlets.config.manager import BaseJSONConfigManager
from pathlib import Path
path = Path.home() / ".jupyter" / "nbconfig"
cm = BaseJSONConfigManager(config_dir=str(path))
tmp = cm.update(
        "rise",
        {
            "theme": "sky", # https://revealjs.com/themes/
            "transition": "fade",
            "start_slideshow_at": "selected",
            "autolaunch": False,
            "width": "100%",
            "height": "100%",
            "header": "",
            "footer":"",
            "scroll": True,
            "enable_chalkboard": True,
            "slideNumber": True,
            "center": False,
            "controlsLayout": "edges",
            "slideNumber": True,
            "hash": True,
        }
    )
Lecture Outline
The Command Line (30 mins)
Lecture Activity (15 mins)
Preview of next week (10 mins)
Announcements
Reminder: Lab 1 is due Wednesday Jan. 27, 2021 at 6 PM
Reminder: Test 0 is available until Saturday at 6 PM
My office hours will be Friday from 1-2 PM on Collaborate Ultra.
The Command Line
If you would like some additional notes and a much deeper explanation of the command line, I suggest the notes from Software Carpentry! They are truly excellent.
In particular, I suggest “Introducing the shell”, “Navigating Files and Directories”, and “Working with Files and Directories”. These have been added to your readings for this week.
What is the Command Line?
The command line is the text interface to the computer that accepts commands that the computer will execute. These commands include:
starting programs
navigating directories and manipulating files
searching, sorting, and editing text files
system and environment configuration
Why learn command line?
The command line is the text interface to the computer. Understanding the command line allows you to interact with the computer in ways that you often cannot with the graphical user interface (GUI).
The command line is commonly used for scripting and automation of tasks and when accessing remote systems. It will also be useful to run programs that make use of the command line (eg. github).
Why use command line?
The command line is part of the operating system (OS), which is software that manages your computer including all devices and programs.
Common operating systems include Windows, Mac OS, and Linux/Unix.
Some commands will be OS specific
You might be wondering why we would ever prefer command line over using the graphical user interface (GUI).
Certain tools may only be available to command line.
Sometimes command line is faster.
Command Line on Windows
The command line on Windows dates back to the original Microsoft operating system called DOS (Disk Operating System) in 1981.
This command line interface is still part of all modern Windows operating systems and is accessible as the “Command Prompt”.
I am recommending you use GitBash instead of the default Windows Command Prompt.
Windows Terminal
This is what the GitBash “Terminal” looks like. From here on out, whenever we say “Terminal”, we mean “GitBash on Windows”, “Terminal on macOS and Ubuntu”
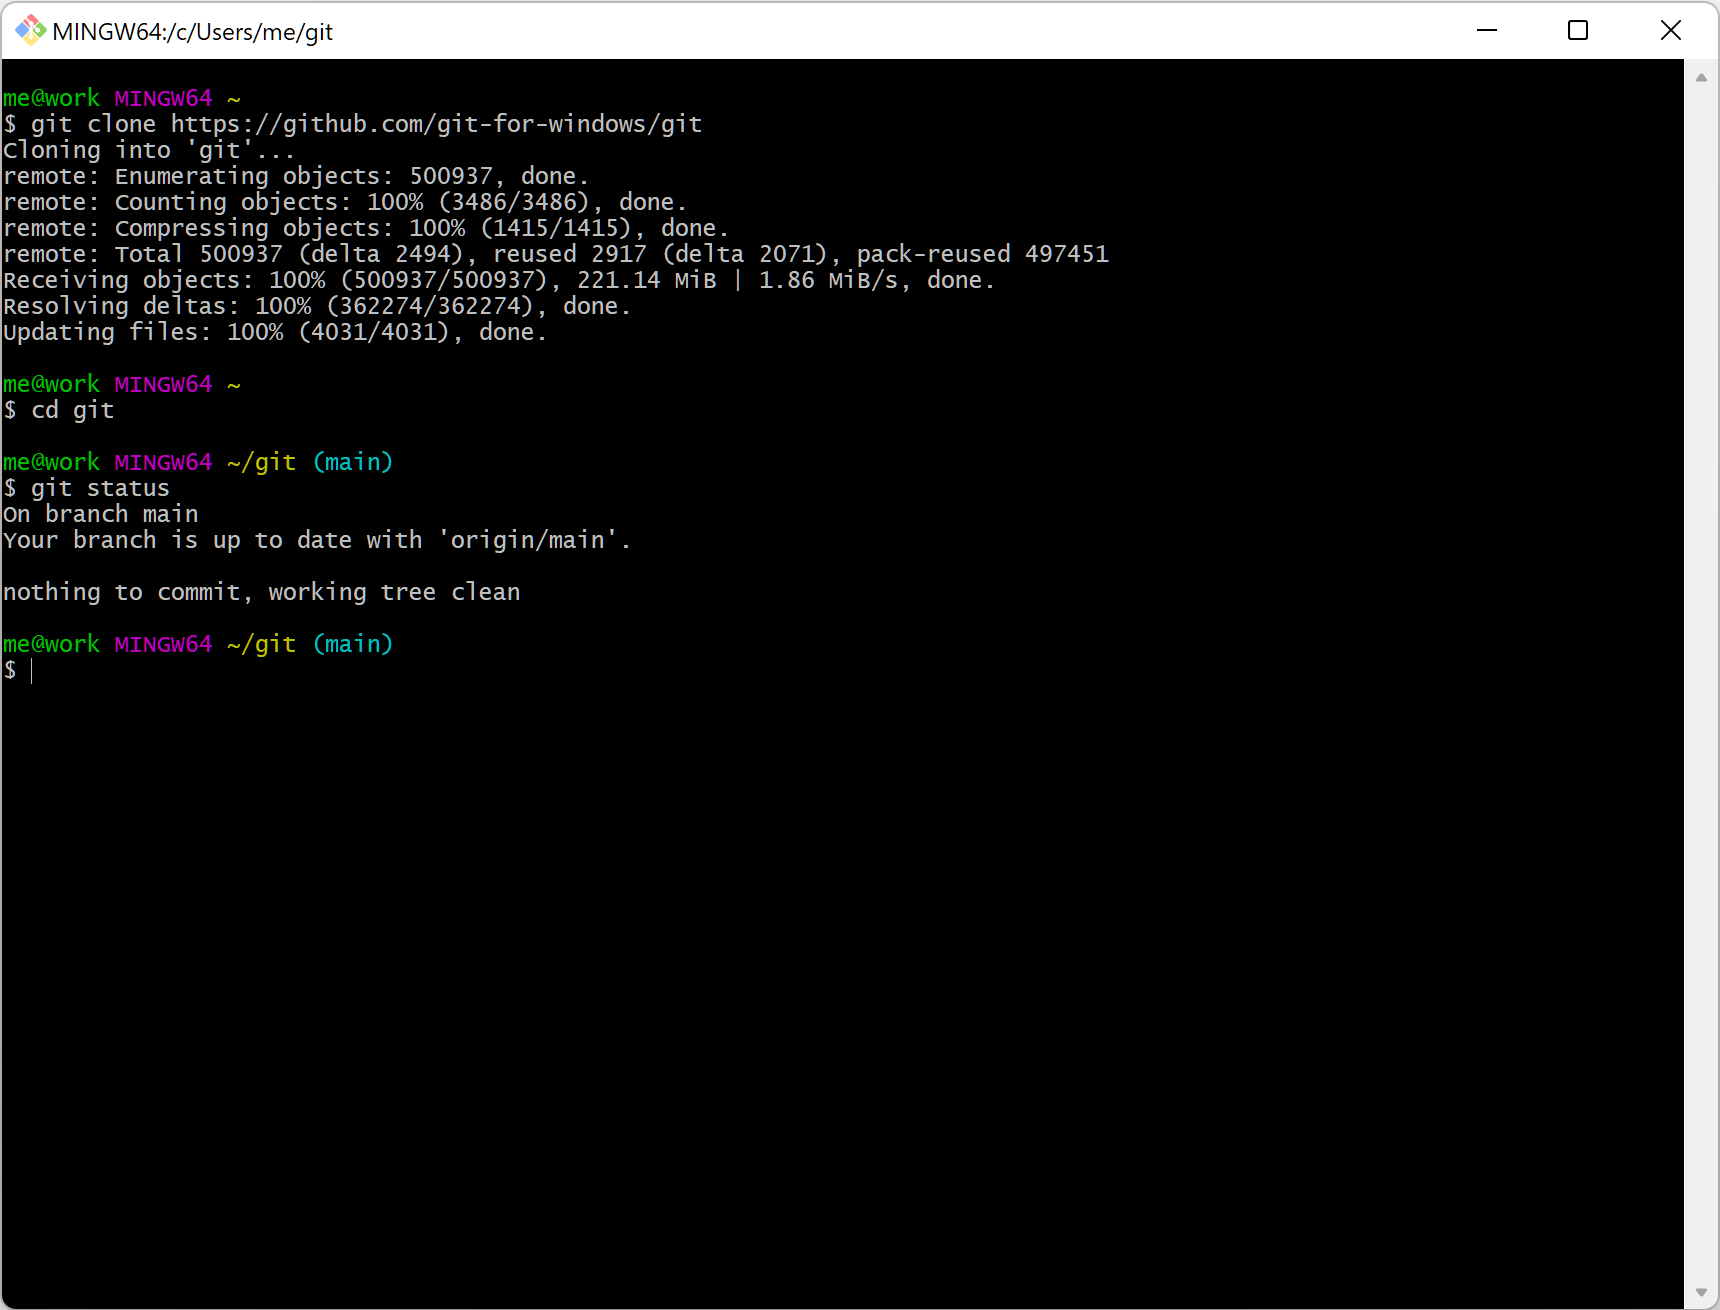
The directory separator is a forward slash
/for Macs/Ubuntu, and the opposite pointing slash on Windows\However if you use GitBash, this should preserve your sanity and you should be able to use forward slash on Windows as well
In fact, many of the macOS/Ubuntu commands will also work in GitBash, but for completeness we will also share the other commands
Image source: Git for windows
Mac OS Command Line
The command line for Mac OS uses the same commands as Linux. It can be opened using Finder then Utilities then Terminal.
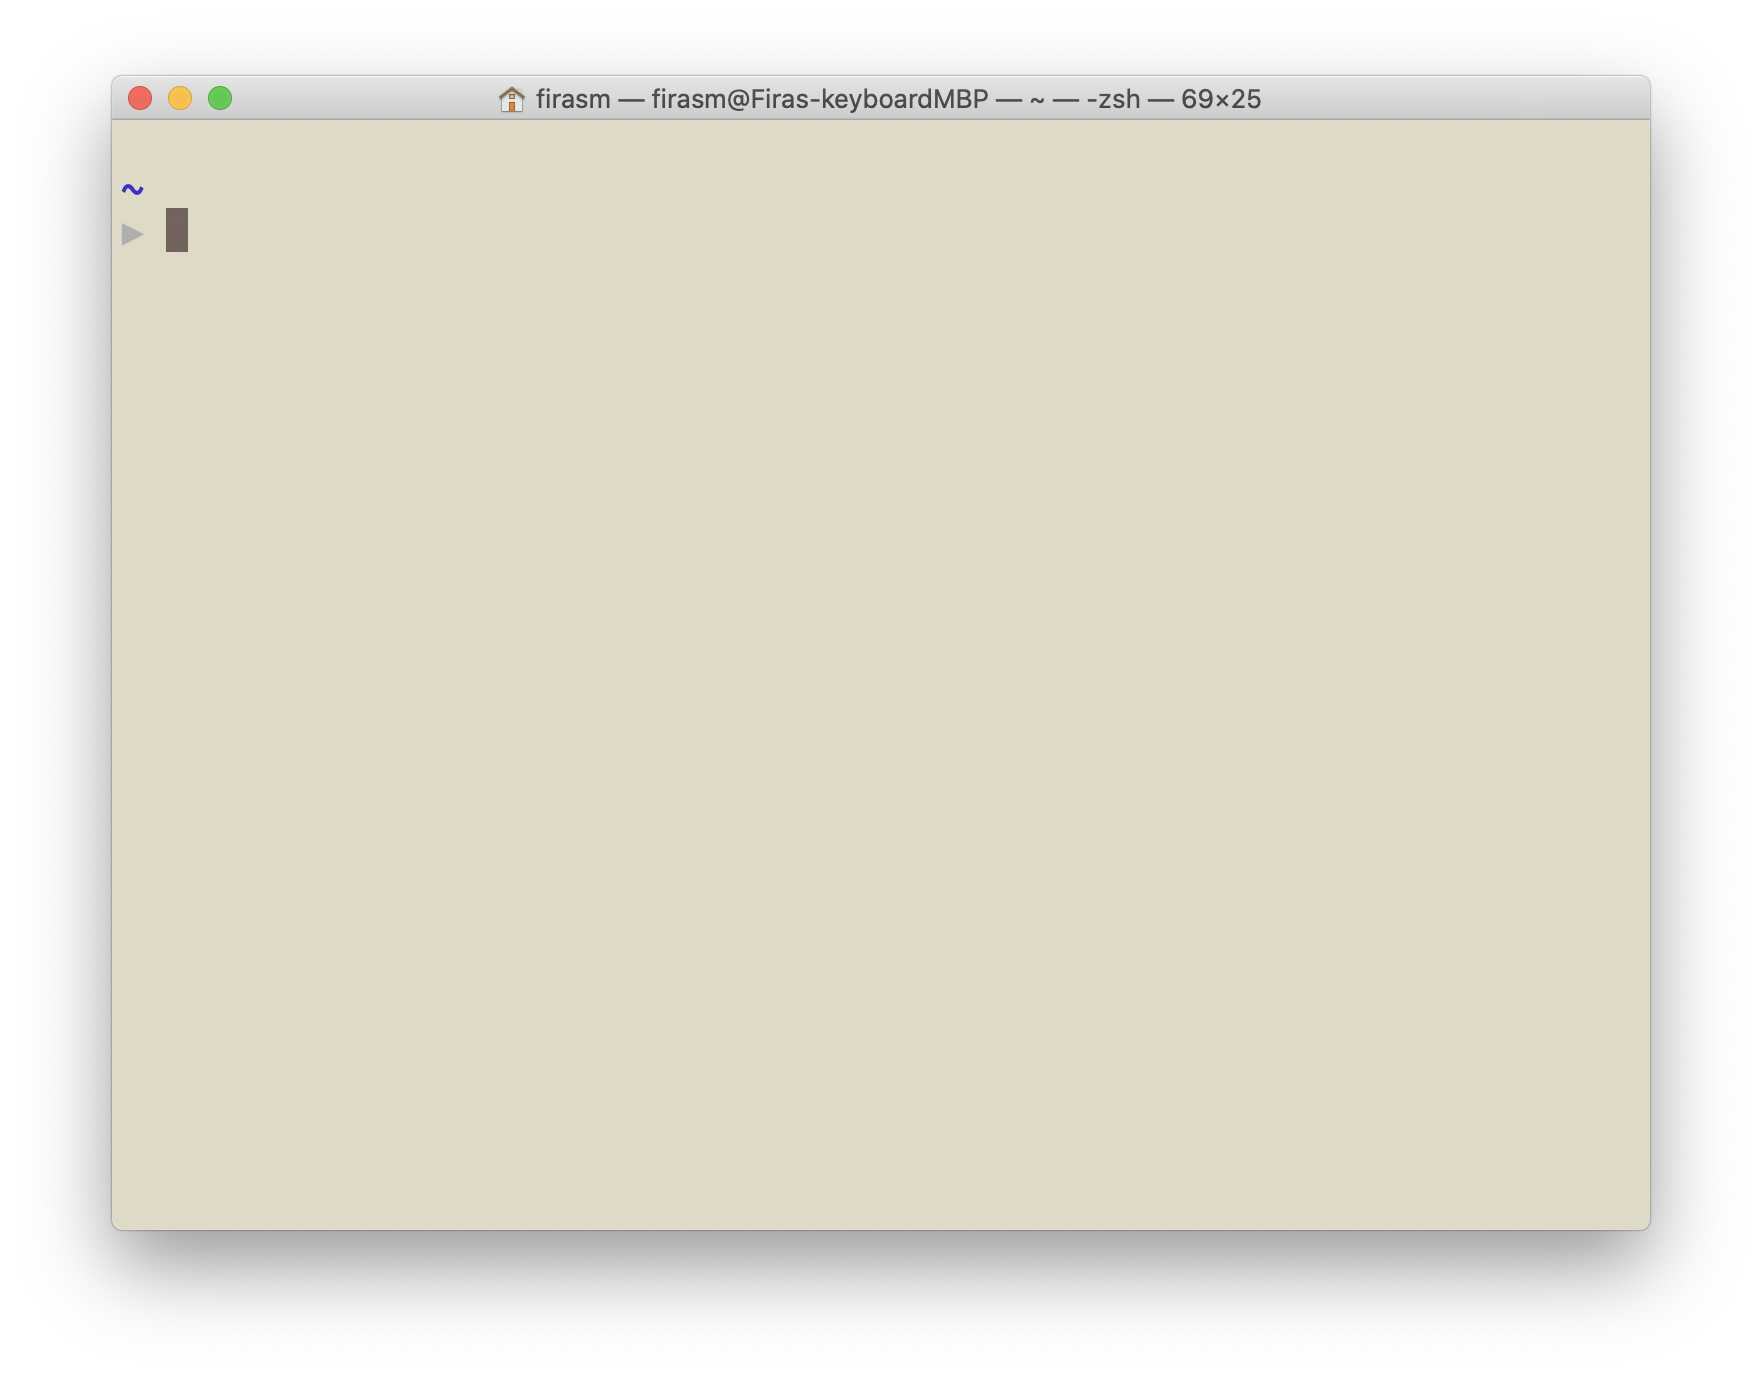
Alternatively, we could type Cmd + spacebar, then type “Terminal” and press ENTER
Entering Commands
Enter a command at a prompt. The prompt may be a > or a $ or customized by the user.
Press ENTER to execute the command.
On Windows, commands are mostly case-insensitive while on Mac/Linux they are case-sensitive.
File System
The file system organizes data on a device as a hierarchy of directories and files (like a tree). Each folder (AKA directory) has a name and can contain any number of files or subdirectories. Each file has a name. The user can change (navigate) directories in the hierarchy.
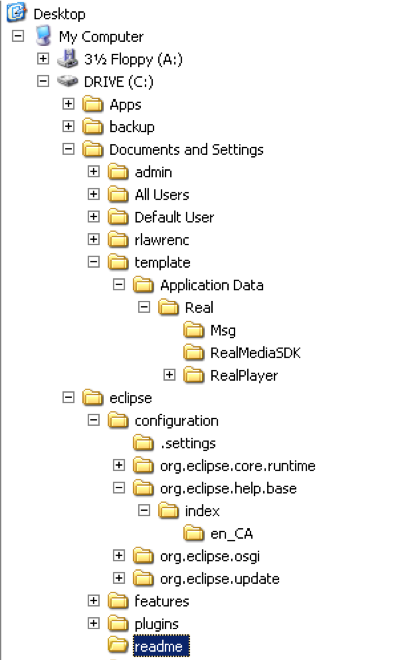
File System
The tree is rooted at, well, the root.
There is only one root of a directory hierarchy. Every item in the tree is either a file or a directory (AKA folder).
You can think of a directory as a container that may contains files and/or other directories.
Files on the other hand hold information (and cannot contain other files or directories) .
If directoryC is contained in directoryP, then directoryC is a child of directoryP and directoryP is said to be the parent to directoryC.
A directory may have many children, but can only have one parent.
Absolute versus Relative Path
The root of the file system is the directory “/”
There is only one root of a directory hierarchy.
A path to a new location (from your current location) can be specified as an absolute path from the root (this will work no matter where we are in the file system):
Navigating relative paths
.is the short-form for the current directory..signifies the parent directory (akin to pressing Cmnd +↑ on a Mac)For example, to navigate (i.e. change directories) to the parent directory of the current directory, use the command: cd …
Note that this command is dependant on your current directory (i.e. the folder you are currently in).
pwd/cd
To print your current working directory type pwd/cd (Mac/Windows) then ENTER .
Absolute versus Relative Path Question
Consider this directory hierarchy.
The user is currently in the directory
level2The
level1directory contains a file calledtest.txt.
Which of the following statements are TRUE?
A relative path to change to directory 301 is
..Absolute path to
test.txtis/Users/ivrbik/301/level1/test.txtRelative path to
test.txtis …/test.txtRelative path to
test.txtis different if user was currently inlevel3directory.There is only one root of the directory hierarchy.

from IPython.display import IFrame, Markdown

display(Markdown('#### Supplementary video on absolute vs. relative paths'))

IFrame('https://www.youtube-nocookie.com/embed/sqX6hu7oEew',width="100%",height="500px")
Lecture Activity
Activity 1A - Accept the Activity and clone it to your computer
Step 1: Accept activity, and open a Terminal
You can find the link to accept the lab here
Step 2: Clone the repo on your local computer
git clone https://...
Step 3: Navigate to that directory
`cd /path/to/where/you/cloned/activity1/
Step 4: Try to navigate the files and folders (if any) in your repo using the Terminal
Step 5: Making changes to the
README.mdcode README.mdand then make changes (for example, you can answer the feedback questions)
Step 6: Commit your changes to the repository
git add -Aorgit add .git commit -m "This is commit message of some sample file"
Step 7: Pushing the changes above
git pushYou can commit and push changes to your repository AS MANY TIMES AS YOU LIKE BEFORE THE DEADLINE
Step 8: Additional Activity live during class causing merge conflicts
Activity 1B - Markdown practice
In this activity, we will practice working with markdown.
In your new repository (cloned on your computer), create a new file called ‘activity.md`.
In this new file called
activity.md, add a header of Level 1 called “Lecture 1 Activity”.Commit the change, add a comment about what it is.
Complete the following survey to link your GitHub.com username to Canvas using your Student Number
Edit the
activity.mdfile, and answer the following questions:Have you ever used GitHub before? Yes/No
Explain - in your own words - what is meant by “version control”
Explain - in your own words - what you think is the difference between Git and GitHub.
Add a link to your favourite restaurant in the city that you live in. Remember, you can add links to markdown files using this syntax:
[name you want people to see](https://link.you.want.people.to.go.to)
Add an image to your repository and describe it in 5 words or less. You can add an image by dragging and dropping the image in the main repository page. Once the image is in your GitHub repository, you can access it by specifying the PATH to it like this:

If your file is not a png, then be sure to add the appropriate extension.
Submit a link to this commit on Canvas. For example, to get the link to this commit, see this screenshot on how to do it:
It will look something like this:
https://github.com/ubco-W2020T2-cosc111/template_activity0/commit/c53f212d4612121e1ebd83bb03965b8500f2f316
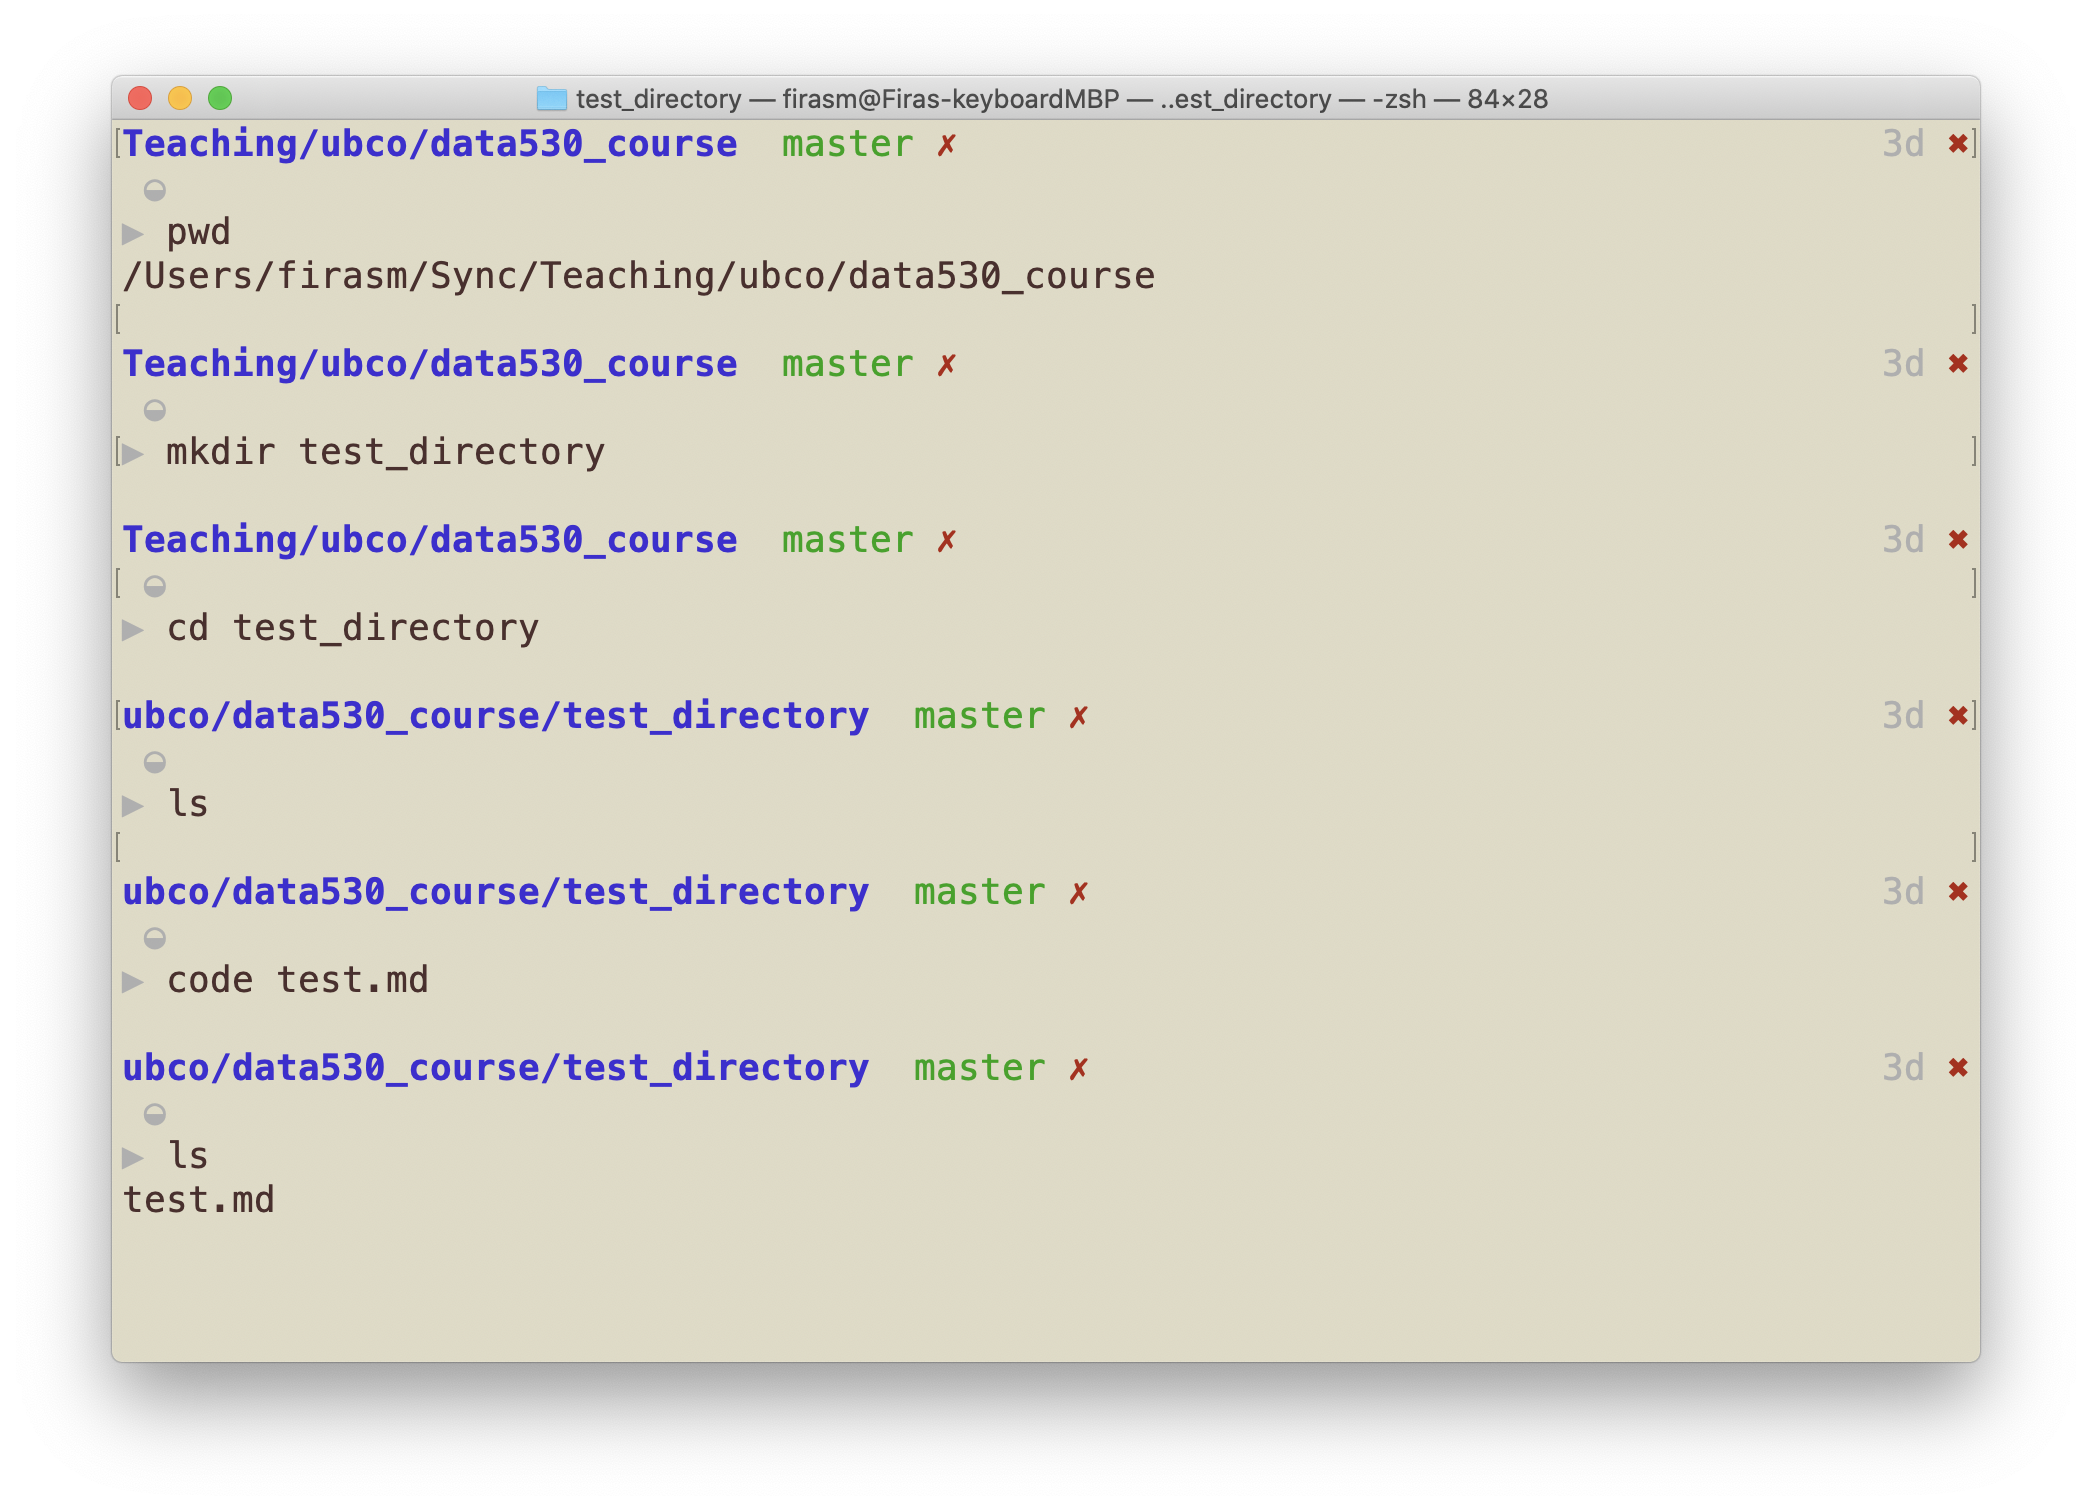
Activity 1C - Reproduce this structure in your repository
The files should be named the same way, but you can leave them empty if you want.
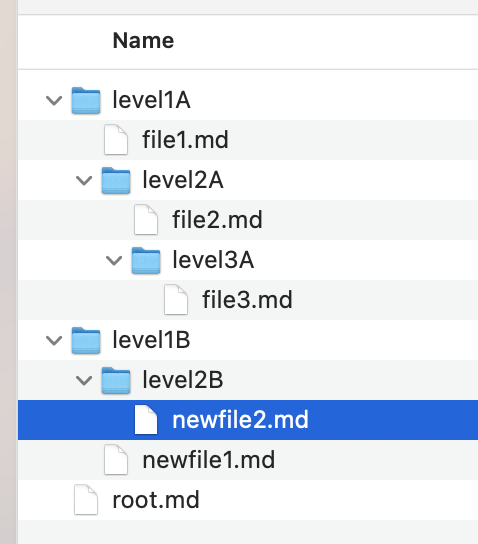
You will need the following commands:
cd: change directorypwd: print working directorymkdir: make directoryls: list directory contentstouch: create an empty file with a specific namecode/pico/nano/vim: edit the file in a text editor
Final step: Copy repo link and paste into Canvas. Submit. After the deadline, we will begin marking submitted assignments.
Preview of next week
Working with Java.
Conclusion
The command line is the text interface to the computer that accepts commands that the computer will execute including running programs, manipulating files, and running scripts.
The command line allows for automation and more control than may be available in the user interface. It may also be the only way to interact with the machine if connecting via SSH.
The command environment allows for redirecting the standard input and output using input/output redirection and pipes.
You need to PRACTICE PRACTICE PRACTICE working in the Terminal: to get yourself used to it, I suggest not using the Finder/Explorer on your computer and use the Terminal for everything.
openwill open a file in the default application
Summary
Briefly explain components of the Install Stack
Define command line and list some of its uses
Explain the purpose of an operating system
Know how to open the command line window on Mac OS and Windows
Enter commands in the Terminal and stop them
Define: file system, folder, file
Explain the difference between an absolute and relative path
Use command line shortcuts to save time
Be able to cancel a command
Explain the reason for an escape symbol
Define and explain the purpose of environment variables. Be able to use grep to search text files.
Describe the full process of submitting a lab on Canvas and GitHub