Task 1 - Set up your computer
Contents
Task 1 - Set up your computer
First, you should follow the install instructions on the course website.
Below are the instructions for you to continue installing software on your system. We will need this for the first python lecture this week.
Getting Started
Once you are done with the install instructions, you can get started with the rest of Lab 1.
Task 1.1: Accept the lab assignment
You can find the link to accept the lab on Canvas, under “Course Content” and then “Lab Links and Solutions”.
You can get your clone URL from GitHub:

Task 1.3: Add, commit, and push your changes to GitHub
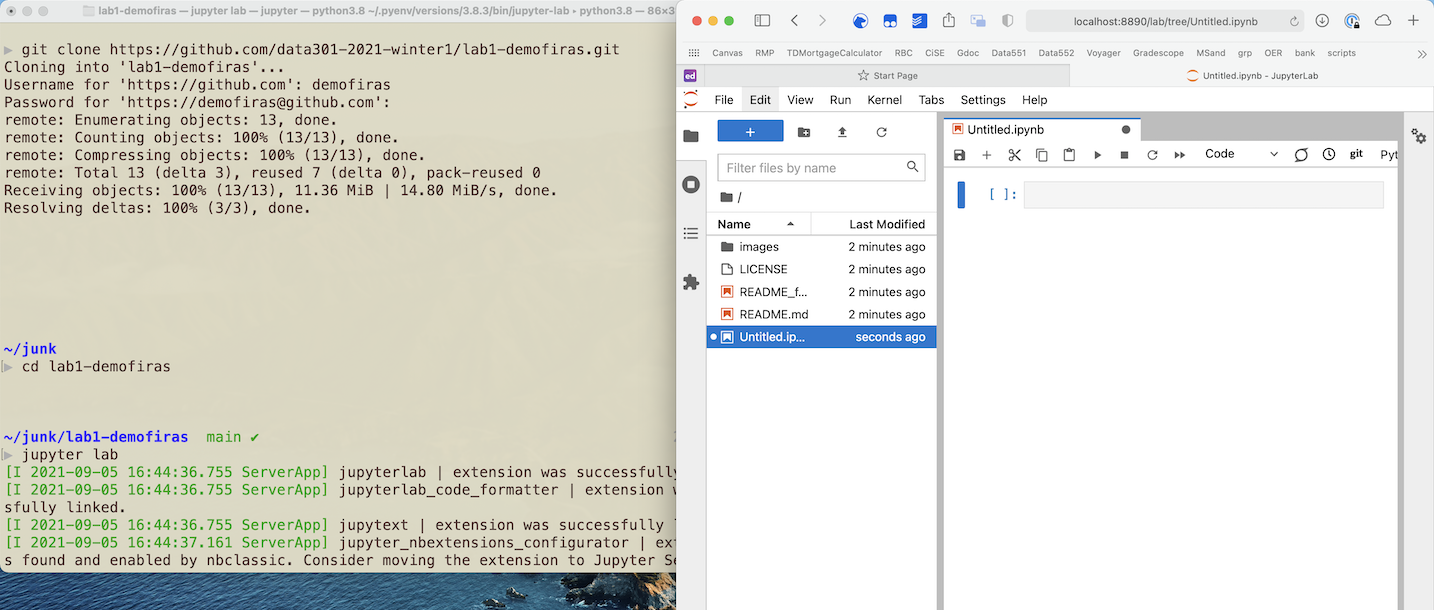
Once you are done cloning Lab1 and have completed the installation instructions, you will need to include a screenshot of a Terminal window, running a Jupyter Lab session locally on your computer, with a Python 3 kernel to get full marks for this portion.
Add the screenshot to the repository (in the main Lab1 directory is fine).
Here is an example of the type of screenshot we are looking for.
Your screenshot must include:
A) a Terminal (GitBash on Windows) window showing you cloning your repository AND
B) running jupyterlab AND
C) A new Python notebook (click on “Python” to create a new Python notebook).

Remember to adjust the name of your screenshot file (it should match exactly, including the extension. Mine is .png, yours could be a jpg, or bmp or tiff) and add your own commit message):
git add screenshot.png
git commit -m "Added Jupyter Lab screenshot"
git push
Onwards to Task 2!


